WordPress Users Tutorial
How to manage users, user roles and capabilities in WordPress
In WordPress you can add/create registered users and assign roles to these users. Each role has a set of permissions which define what users belonging to that role are allowed to do. These users should be distinguished from regular visitors/guest. Guests are all the people that visit and browse the frontend of your site but are not allowed any access to the admin panel and to any features related to managing the site. Registered users on the other hand are allowed access to some or all of the features of the admin panel, and thus they can help in expanding and managing the site (e.g. writing and publishing posts and pages, managing comments, etc.). What a user is allowed to do depends on the user role to which they belong.
When you install a WordPress application on your WordPress hosting account a new users is added during the installation process. This user (you) is automatically assigned to the administrator user role. This is the user role that has access to all the settings in the admin panel. WordPress comes with a few other preconfigured user roles (editor, author, contributer, subscriber). We'll come to these roles further down in this tutorial in the section on user roles.
In this tutorial we'll review the section in the admin panel related to managing users. We'll go over the general screen and the options there, as well as over the forms for adding new registered users and for editing the profiles of existing users. We'll also go over the different user roles and their capabilities and we'll show you how to enable and disable the option for allowing guests to register from the frontend of the site.
Users Administration Screen
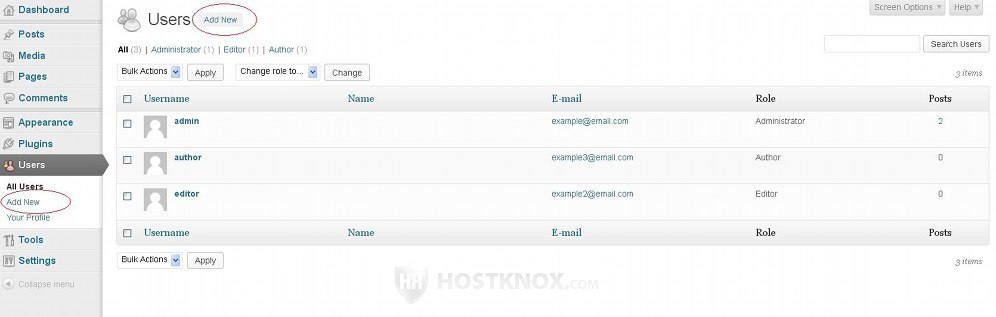
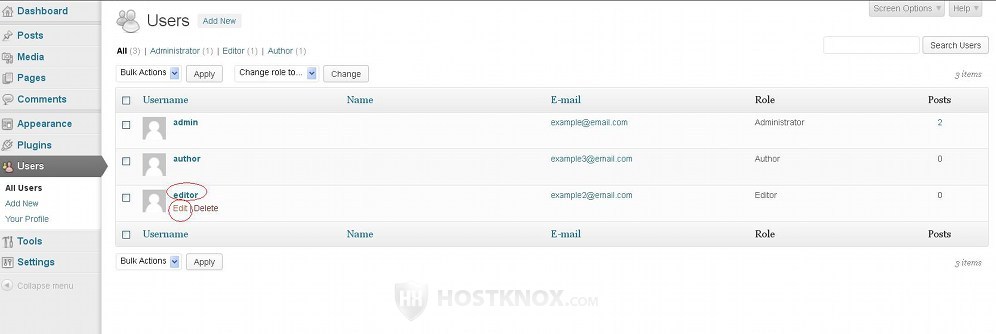
To manage, add and edit users, log in to the admin panel of your WordPress and click on the Users tab on the left. On the screen that opens on the right you'll see a table with the existing registered users. There should be at least one user (an administrator) that was created during the installation. The table itself is divided into several columns that show information about the user: Username, Name, E-mail, Role, Posts.
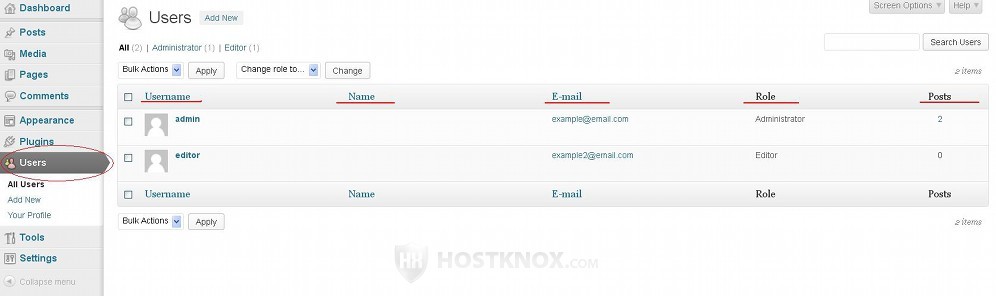
Note that some information is optional so it may not be shown in the table. For example, when creating a user it's not required to specify a name (just a username), and so the name column might be empty (in case no name was specified). Some of the columns can be removed from the table. This can be done from the screen options. To do this click on the Screen Options button in the upper right corner of the screen. This will expand a panel with a few checkboxes. Unmark the checkbox(es) corresponding to the column(s) that you want to remove:
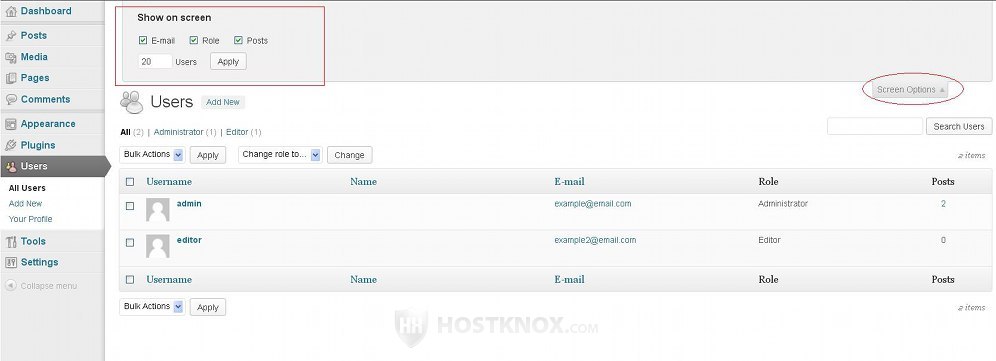
To make the column visible again just mark the checkbox. You can remove/add the columns showing the email and role of the users, as well as the one showing the number of posts published by each user. From the screen options you can also set the number of users per page shown in the table. By default, it's set to 20.
Using the table itself and the options provided by it you can do several things. With the Bulk Actions drop-down menu you can delete one or more users. To do this mark the checkbox in front of the username of each user you want to delete, select Delete from the drop-down menu and click on the Apply button next to it:
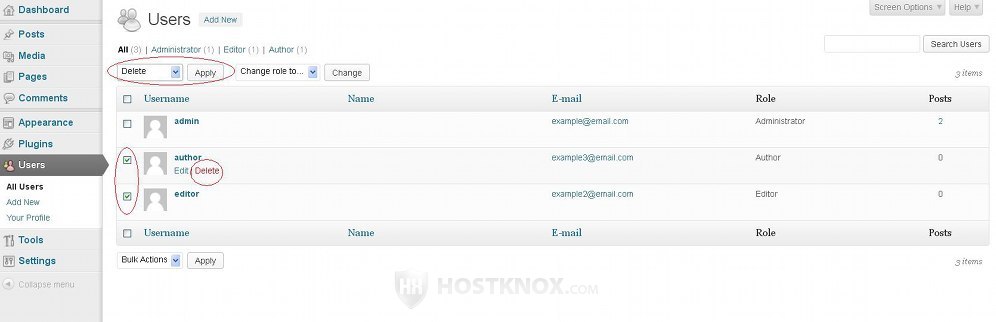
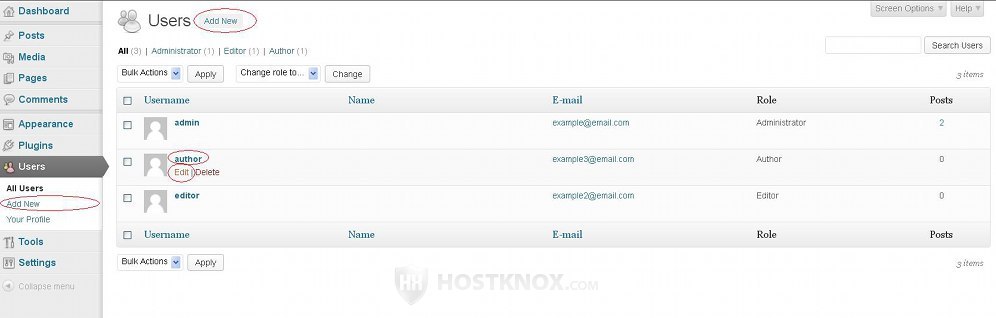
In case you want to delete just a single user, hover the mouse pointer over the row of that user in the table and click on the Delete button that appears under the username (as shown in the screenshot above). Once you select one or more users to be deleted and you click on the button a new page will open. On that page you can select what is to be done with the posts published by these users. You can delete the posts together with the users or you can attribute them to another user:
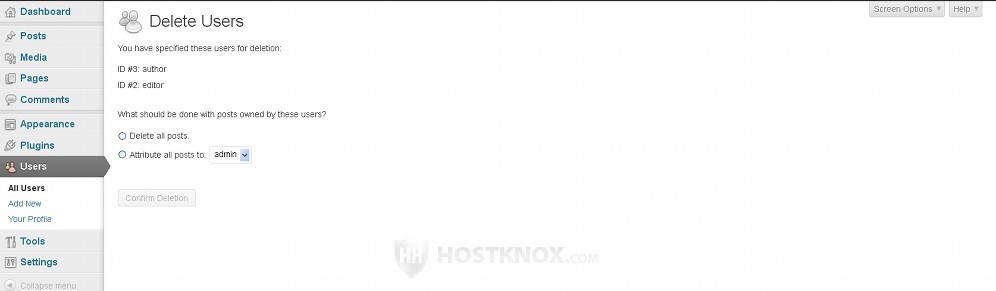
Just mark the respective radio button and click on the Confirm Deletion button.
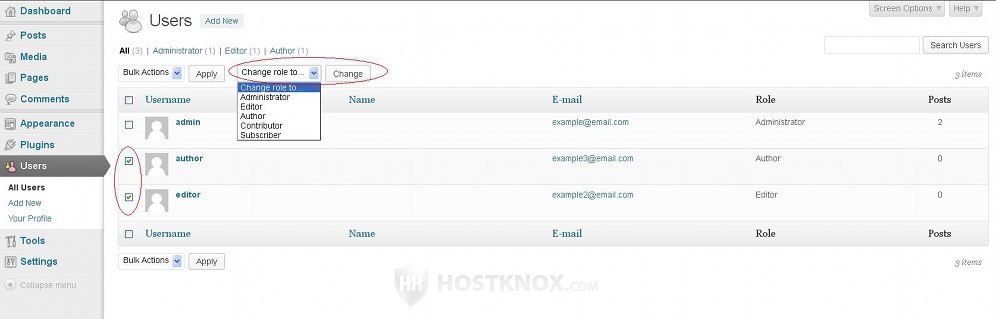
Back on the Users screen, you can change the user role of several users at the same time. To do this mark the checkbox corresponding to each user, select the user role from the Change role to drop-down menu that's above the table and click on the Change button next to it:
Of course, you can also change the role of each individual user by editing the profile of that user.
To edit the profile/settings of a user either click on their user name in the table, or hover the mouse pointer over the row in the table and click on the Edit button that appears. To add a new user click either on the Add New button that's in the top left corner of the page or on the one that's under the Users menu on the left:
The form for adding new users and the one for editing existing ones contain similar settings, but in the case with the form for editing profiles there are some additional options. We'll go over both forms.
Adding New Registered Users
To add new users, log into the admin a panel and click on the Users menu on the left, then either click on the Add New sub-menu or on the Add New button that's above the table with the registered users:
This will open the form for registering new users:
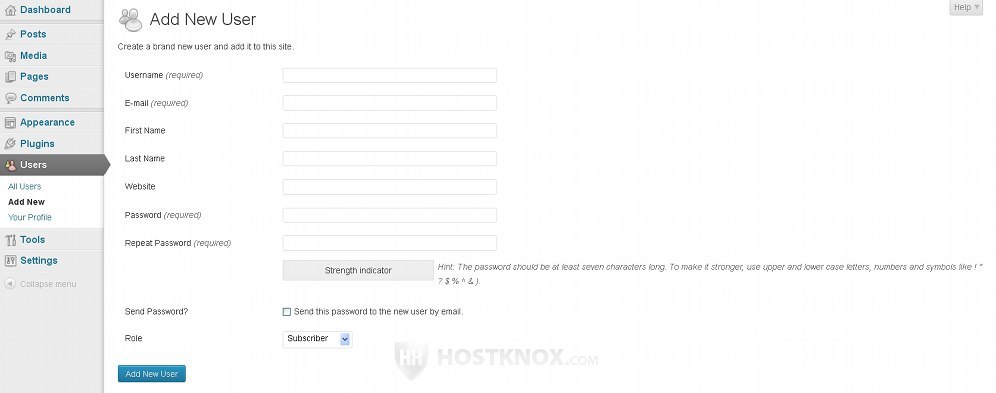
The options on that page are pretty much self-explanatory. To be able to register a new user you have to specify a username, an email address and you have to type a password (twice). You can select a user role from the Role drop-down menu; you can select one of the preconfigured roles. The rest of the settings are optional. You can type a first and last name, you can specify a website (if the user has one). If you want the password to be emailed to the user, mark the checkbox labeled Send Password.
When you're done click on the Add New User button at the bottom of the page.
Editing Profiles of Registered User
You can edit the options of each user that's already registered. Users can also edit their own profiles themselves. To edit a user profile, after you log in to the admin panel, click on the Users menu on the left. Then in the table with the existing users either click on the username of the user profile you want to edit, or hover the mouse pointer over the corresponding row in the table and click on the Edit button that appears:
On the page that opens the options are grouped into several sections. There are options that are not available on the form for adding new users. The first two groups with options are Personal Options and Name:
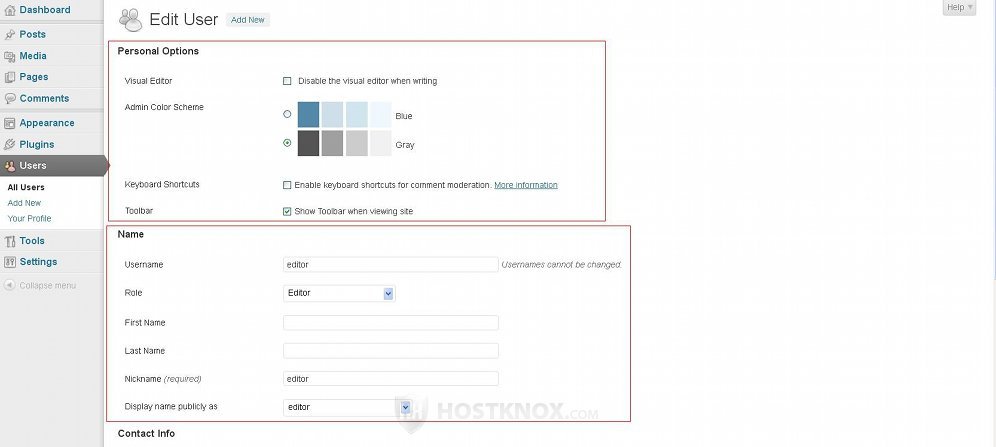
The Personal Options section contains the following settings:
- Visual Editor - by default, this checkbox is unmarked which means that the visual editor is enabled. The editor is used when writing/editing posts and pages. With the visual editor the user can format the text (e.g. italicize text, make it bold, center it etc.) and see the result in the editor itself. If you disable it, the user will be able to use only the text editor which shows the HTML tags only. The result on the frontend, of course, will be the same, no matter which editor is used.
- Admin Color Scheme - with this option you can change the color of the admin panel. By default, different shades of gray are used. The other choice is different shades of blue.
- Keyboard Shortcuts - these are disabled by default. They are used when moderating comments from the Comments section of the admin panel. The purpose behind these shortcuts is, of course, to be able to approve/unapprove, delete, etc. comments more quickly. Here we'll not discuss the different keyboard shortcuts. Just as an example, when you go to the Comments menu of the admin panel this will display the table with the comments. Pressing j on your keyboard will mark the first comment, pressing it again will mark the next one, and so on. With the k button you can move up. When you press a the marked/selected comment will be approved, while pressing u will unapprove it. For more information read the tutorial on how to use keyboard shortcuts to manage comments in WordPress.
- Toolbar - this option is enabled by default. As you have probably noticed, when you're logged in the admin panel and you visit the frontend of your site, there's a toolbar present at the top of the page. You can use that toolbar to visit various sections of the admin panel, to log out, etc. If you don't want to see this toolbar on the frontend, just unmark the Toolbar checkbox.
The Name section of the user edit form allows you to specify/change the first and last name of the user, to change the role to which the user belongs and to select the name that will be displayed on the frontend (e.g. under post titles of posts published by that user). The name shown on the frontend can be the username, only the first name, only the last name or both the first and last name. If you haven't specified a first and last name, there are no other options to choose for the name to be shown on the frontend except for the username. The username itself can't be changed/edited once the user is added.
The next two groups with options on the edit user form are Contact Info and About the user:
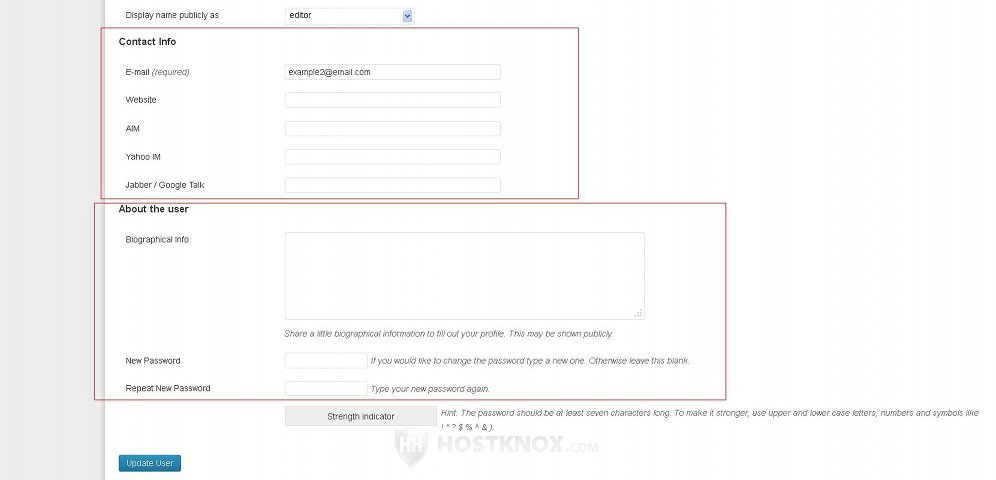
The E-mail option is the only required one in the Contact Info section. The others are optional; if the user has a website, you can add it. You can also add Jabber/Google Talk info, etc.
From the section About the user you can change the password of the user. Simply type the new password in the two fields that are provided. There's also a text area labeled Biographical Info. It's optional. If you want to, you can add any information about the user. Whether this information is shown on the frontend depends on the theme. With some themes it's shown, for example, at the top of the page that lists all the posts published by or attributed to the user. Some themes don't show this information at all.
If you make any changes to the settings, don't forget to click on the Update User button.
User Roles
WordPress comes with several preconfigured user roles. Each one is preconfigured with a set of permissions. These roles are:
- Administrator - this is the role that gives access to all options and features of the admin panel.
- Editor - this role allows the users that belong to it to publish, edit and delete posts and pages. They can manage not only the posts and pages that they have created but also those added by other users. They can also manage categories, tags and media files, and moderate comments.
- Author - an author can publish and manage only their own posts. They cannot manage the posts of other users, and they cannot do anything else.
- Contributer - a contributer can write and edit their own posts but they cannot publish them. Posts written by contributers have to be published by a user belonging to a user role that is allowed to publish posts (author, editor, admin).
- Subscriber - a subscriber is not much different than a guest. The only area in the admin panel to which a subscriber has access is their own profile settings.
There's another role that's present when you enable the multisite feature of WordPress (when you manage more than one site from the same admin panel). This role is Super Admin. Basically, it's the same as the administrator role but it gives access to the options of all sites within the network, while the administrator role is limited within a single site in the network.
By default, you can't edit the permissions of user roles and you can't add new user roles. There are third party plugins however that allow you to do such things. A useful and widely used plugin that allows you to do exactly that is User Role Editor. Another similar plugin that has some additional functions such as limiting access to particular posts, pages, etc., both on the frontend and in the admin panel, is Advanced Access Manager.
Enabling and Disabling Frontend User Registration
By default, users can be registered only from the admin panel. This can be done by another registered user who has the permissions to do it. From the preconfigured user roles only administrators are allowed to register and manage users.
There's an option however with which you can allow guests/visitors to register themselves from the frontend of the site. To enable this option, in the admin panel go to Settings menu>General sub-menu and mark the checkbox next to the Membership option:
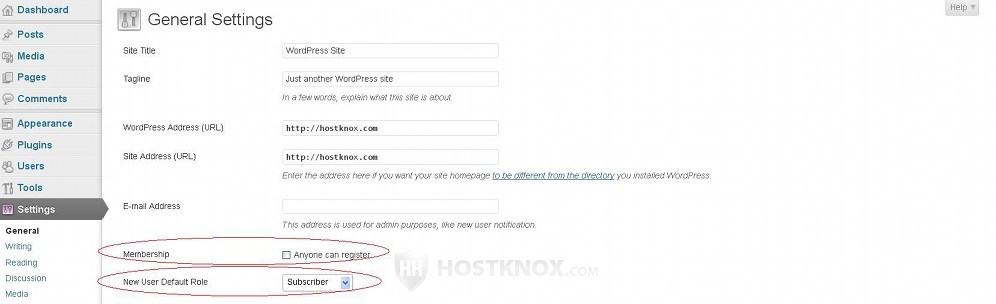
The option right under it is New User Default Role and you can use it to set the default role to which these newly registered users will be automatically assigned. By default, it's set to Subscriber. In case you allow users to register from the frontend it's not a very good idea to change that to a role with more capabilities. Otherwise, you'll give some access to the admin panel to anybody who registers.
If you allow anyone to register, a Register link will be added on the frontend. With the default WordPress themes that come with the application the link is included in the Meta menu. The same menu that contains a Log in/Log out link, a link to the admin panel, etc.