WordPress General Settings Tutorial
How to manage the general settings in WordPress
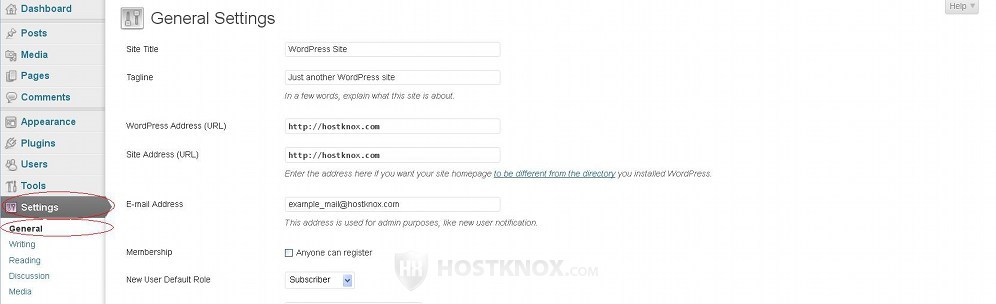
In this tutorial we'll review the settings that you can configure by going to Settings menu>General sub-menu in your admin panel:
Site Title and Tagline
The first two options on the page with the system general settings are for the site title and the tagline:
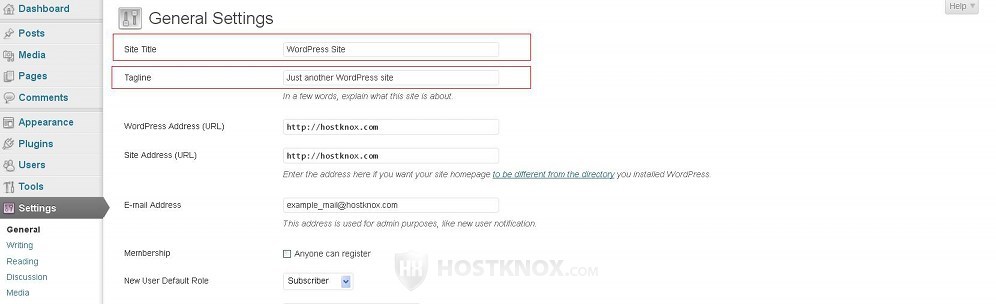
- Site Title - the site title is first specified during the installation process. Once the installation is complete you can change it to anything you want from the general settings. Most themes, including the default themes that come prepackaged with WordPress, display the site title on the frontend at the top of every page. It's also usually a link to the homepage of the site.
- Tagline - the tagline is a short text that's shown on the frontend just below the site title. Most themes show the tagline on the frontend, but this depends on the particular theme. The default text is Just another WordPress site. You can change it after the installation is complete. Unlike the site title the tagline cannot be specified during the installation process.
Note that the site title and the tagline can also be changed from the settings of your current theme. To do this, in the admin panel go to Appearance menu>Themes sub-menu>Customize button that's under the current theme on the right>Site Title & Tagline panel on the left. It doesn't matter whether you change the site title and the tagline from the general settings or from the options of the currently active theme. In both cases this will update the title and the tagline. Changing the current theme will not cause the title and tagline to be switched back to the old ones.
WordPress Address and Site Address
The next to options are WordPress Address (URL) and Site Address (URL):
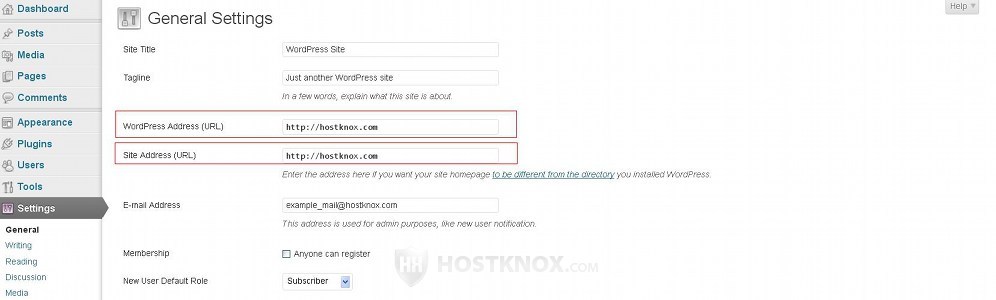
If you haven't made any changes after the installation they should both be the same and correspond to the URL address at which the homepage of your site can be accessed.
- WordPress Address (URL) - this is the URL address that corresponds to the location of the WordPress directory on your hosting account. For example, if your WordPress is installed in a folder called wordpress directly in the public_html directory on your WordPress hosting account (making the path to the application on the account public_html/wordpress), then the WordPress address URL should be http://yourdomain.com/wordpress.
- Site Address (URL) - generally, as we said, the site address has the same URL as the WordPress address. You can use a different site address, for example, if you want to store your core WordPress files and folders in a different directory than the one used to access the frontend of your site. For instance, if you want your WordPress to be stored in public_html/wordpress on your account (making the WordPress address http://yourdomain.com/wordpress), but you want the site to be accessed directly at http://yourdomain.com. In this case in addition to changing the site address option a few other things have to be done. For more information read the tutorial on how to store WordPress in one folder but make it accessible from another.
Another instance in which you can use these two options is when you want to transfer your WordPress to a different hosting account with a different domain name, or when you just change your domain name. If you want to transfer your WordPress and you're going to use a different domain name, change the URLs for both options before you export the database. This will update a couple of options related to the URL in the database. For more information on how to transfer WordPress to a different host or to a different hosting account read the tutorial on how to transfer WordPress to another host.
To be more precise, both of the updated table rows are located in the wp_options table in the database. The WordPress Address setting updates the value in the table row that has siteurl for an option_name, and the Site Address setting updates the table row that has home for an option_name. In the section on changing URLs manually in the tutorial on how to transfer WordPress to a different host you'll find more information on how to change these options directly in the database.
E-mail Address
From the E-mail Address option you can change the email address to which various automatic notifications related to the site are sent:
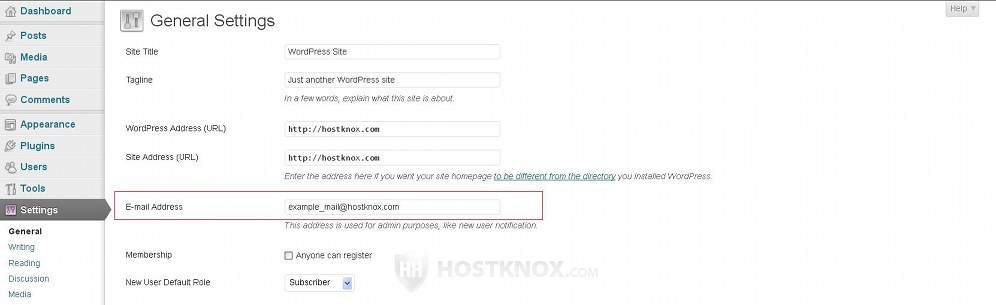
The different notifications related to maintaining the site are sent to this email address. This address is not displayed on the frontend of the site.
Keep in mind that initially this site email address and the email address of the admin user that's created during the installation are the same email address. Using this option you can change the site email address, while by going to the Users menu in the admin panel you can change the email address of the first admin user created during the installation (and of any other user). Changing any of the two options will not affect the other, so you can have a general site email address that's different than that of the admin user.
Membership and Default User Role
Under the email address there are a couple of options related to user registration and user roles:
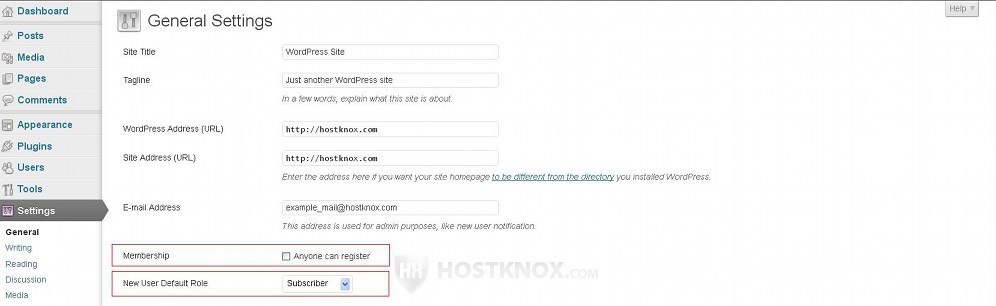
- Membership - this checkbox is unmarked by default. This means that users can be registered only from the admin panel by other registered users who are allowed to do so. If you want visitors be able to register by themselves from the frontend of the site, mark this checkbox.
- New User Default Role - this is the role that's automatically assigned to new users. If you allow visitors to register from the frontend, this is the role to which they will belong once they register. When adding registered users from the admin panel this is the role to which the option for choosing a user role will be set by default. Of course, when registering a user from the admin panel you can change the role to any of the existing user roles. By default, new users are registered as subscribers.
For more information on users and user roles check out the tutorial on how to manage users and user roles in WordPress.
Date and Time Options
The rest of the general settings are for changing the time zone, the date and time format and the day considered the start of the week:
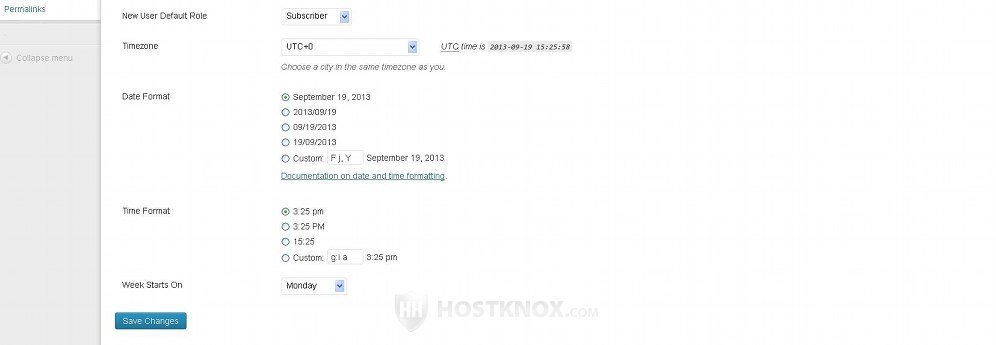
- Timezone - from this drop-down menu you can change the time zone associated with your site.
- Date Format - this option offers several preconfigured date formats. Just mark the radio button of the date format that you want to use. There's also a button with which you can configure a custom date format. Here we won't go into details of how to configure custom formats, but in short a single letter stands for a component of the date. For example, F is used to represent the month typed in letters (e.g. September), while m is for the month but in numbers (e.g. 09). For more information on this check out the tutorial on how to manage custom date and time formats in WordPress. Keep in mind that this is the date format that's displayed on the frontend (e.g. under post titles); it doesn't affect the format used in the admin panel.
- Time Format - similar to the previous option, but in this case you can change the time format used on the frontend. You can use one of the preconfigured time formats (e.g. 3:25 pm, 3:25 PM, 15:25), or you can create a custom time format. For more information on custom time formats read the tutorial on how to configure custom date and time formats in WordPress.
- Week Starts On - with this option you can change the day that is considered the start of the week. By default, it's set to Monday. This is used with various calenders displayed on the frontend of your site (if you use any at all). For example, if you activate the calendar widget that comes prepackaged with WordPress, the first column of the calender that's shown on the frontend will be Monday.
If you make any changes don't forget to click on the Save Changes button at the bottom of the page.