WordPress Multisite Network Settings Tutorial
How to manage the network settings in WordPress multisite
The network admin panel of a WordPress multisite installation has some network settings that are available only in the network admin panel and not in the admin panels of sites in the network. To access and configure these settings, in the network admin panel go to Settings menu>Network Settings sub-menu:
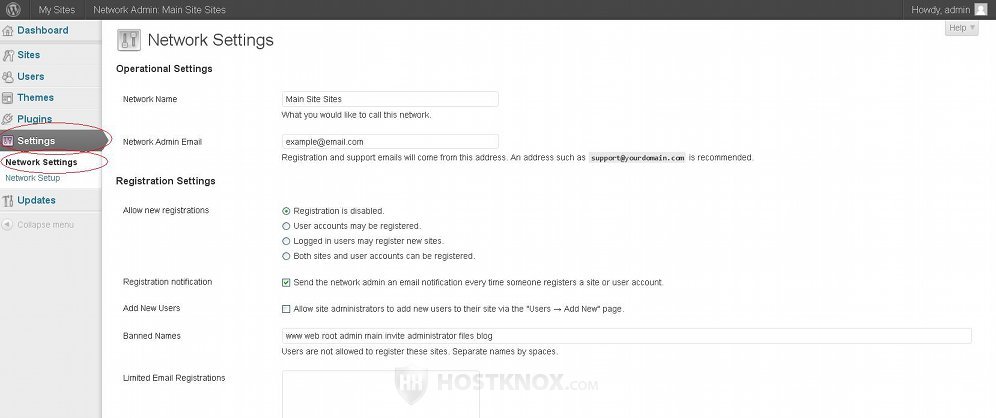
On the page that opens you'll see a lot of options gathered into several groups.
In this tutorial we'll review these settings.
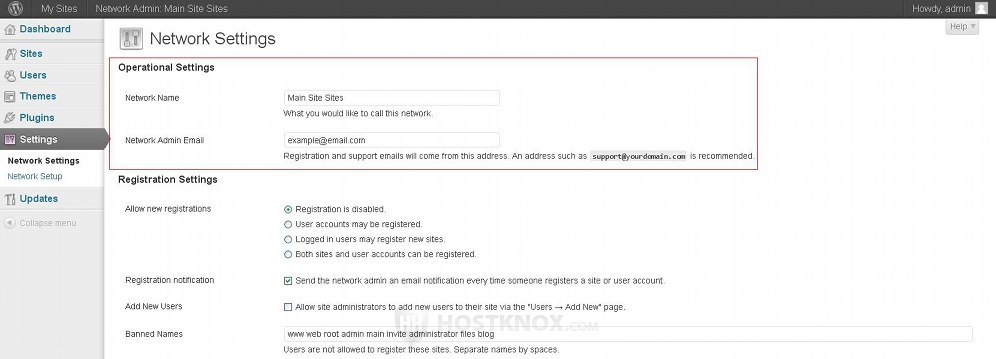
Operational Settings
In this group there are a couple of options:
They are:
- Network Name - this is the name used to refer to your multisite network. It's first set during the installation of the multisite. You can change it to anything you want.
- Network Admin Email - this is the email address that will be shown in the From field of email messages sent automatically from your WordPress for various administration purposes. For example, when a new site is created, the login credentials for the administrator of that site will be sent to the email address of that admin and the network admin email will be shown in the From field of such messages. Another similar example is when new users are registered for each site in the network, that's the email address that's shown in the From field of the messages sent to the user email addresses.
When a new site is added from the network admin panel a notification email is sent to the network admin email address. If the Registration notification option is enabled (it's on the same Network Settings page and it's enabled by default), notification emails will be sent to this email address when new users are registered and when users add new sites to the network. Users other than super admins can register sites only if they are allowed to do so. Check the Registration Settings section of this tutorial for more information.
The network admin email is first set in the admin panel of your main site during the multisite installation. By default, it's also the email address of the first super admin user that's created during the multisite installation. If you change the network admin email however, the email address of the super admin will not be changed so that you can have different email addresses for the network and for the super admin.
Registration Settings
The group of options labeled Registration Settings consists of options related to the registration of sites and of user accounts:

The first option is Allow new registrations and it's actually a whole group of radio buttons with which you can enable/disable frontend user account registrations and the creation of new sites by registered users (other than super admins). These radio buttons are:
- Registration is disabled - sites cannot be created by users other than super admins and user account registration cannot be performed from the frontend. This is the radio button that's marked by default.
- User accounts may be registered - enables user registration from the frontend. A Register link will be automatically added to the Meta menu on the frontend of all sites in the network. A user who registers an account from the frontend of one of the sites in the network is automatically registered on all sites in the network with the user role subscriber. First an email with an activation link is sent to the email address of the user, and after they click on the link they'll receive an email with the login credentials. A user who registers in such a way is not listed in the Users section of the admin panels of the individual sites in the network but just in the Users section of the network admin panel. Such a user can be added to a site with the Add Existing User form that's in the Users section of the admin panel (Users menu>Add New sub-menu) of each individual site in the network.
Note that in the admin panel of a regular single-site WordPress installation you can enable frontend user account registration from Settings menu>General sub-menu. In a multisite installation there's no such option in the admin panels of individual sites, and so this cannot be done on a per site level. It can be done only from the network settings of the network admin panel. - Logged in users may register new sites - when you mark this radio button frontend user account registration will be disabled, but users who are registered will be allowed to create new sites in the multisite network. Users that belong to any of the default roles (subscriber, contributor, author, editor, admin) that come prepackaged with WordPress will be allowed to create new sites. Note however that those users with the user role subscriber who have registered from the frontend or who were registered from the network admin panel (and thus are not listed in the Users sections of the admin panels of individual sites in the network) will not be able to create new sites regardless of the fact that they can actually log into the dashboards of the sites in the network. To be able to do this they have to be added from the Add Existing User form of the admin panel (Users menu>Add New sub-menu) of a site in the network. Users registered from the admin panel of a site in the network don't have this problem.
- Both sites and user accounts can be registered - if you want to enable both frontend user account registration and you want to allow registered users to create new sites, mark this checkbox. All the information peculiar to frontend user registration and to site registration that we've included in the descriptions of the previous two radio buttons, applies for this one too. The only difference is that with this radio button marked, both actions can be performed. With this option enabled when a new user registers from the frontend of a site in the network they will be offered the choice to be only registered as a user or to be registered and a new site to be added (that user will be the admin of the new site).
Let's have a look at how registered users can actually create new sites. After a registered user logs into the admin panel of the site on which they are registered, they have to go to Dashboard menu>My Sites sub-menu:
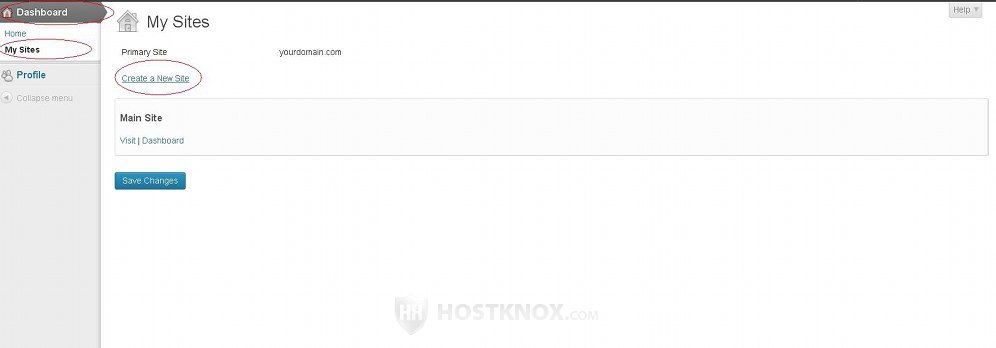
On the page that opens they just have to click on the Create a New Site link. This will redirect the user to a form on the frontend:
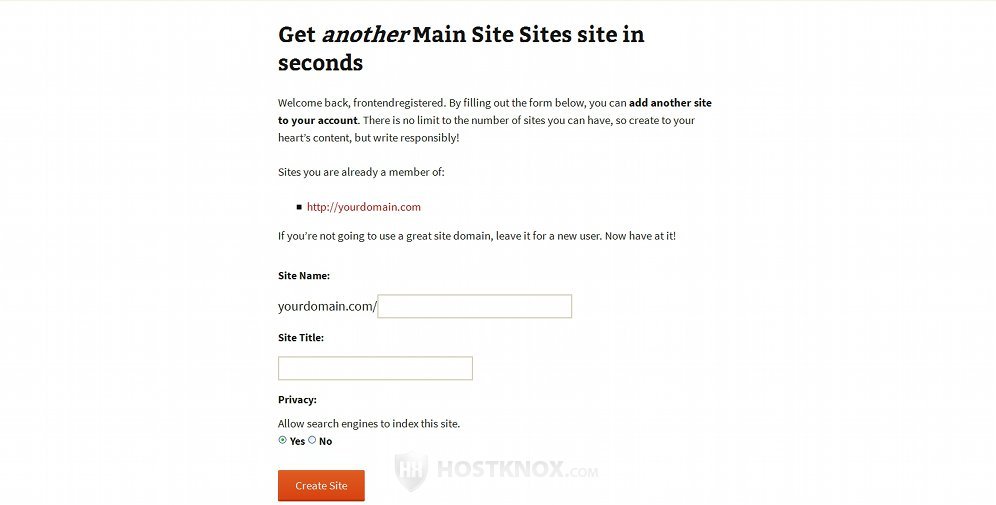
The user only has to type in the Site Name field the subdirectory or subdomain part of the URL of the site that's to be added (depending on whether the multisite network is configured to add sites as subdirectories or subdomains of the main site), type a site title in the respective field, optionally change the privacy setting and click on the Create Site button at the bottom of the page.
The site will be created without the need for any confirmation or approval by a super admin. Of course, super admins can always deactivate or delete sites in the network. The user who creates the site will be automatically added as the admin of that site with full access to its dashboard/admin panel. However the user role of that user will not be changed for the other sites in the network on which he/she is registered. For example, if the user is registered as a subscriber on yourdomain.com/site1 and then they create a site yourdomain.com/site2. That user will be registered as an admin on yourdomain.com/site2, but they will still be only a subscriber on yourdomain.com/site1.
Now let's go to the rest of the options in the section Registration Settings:
These options are:
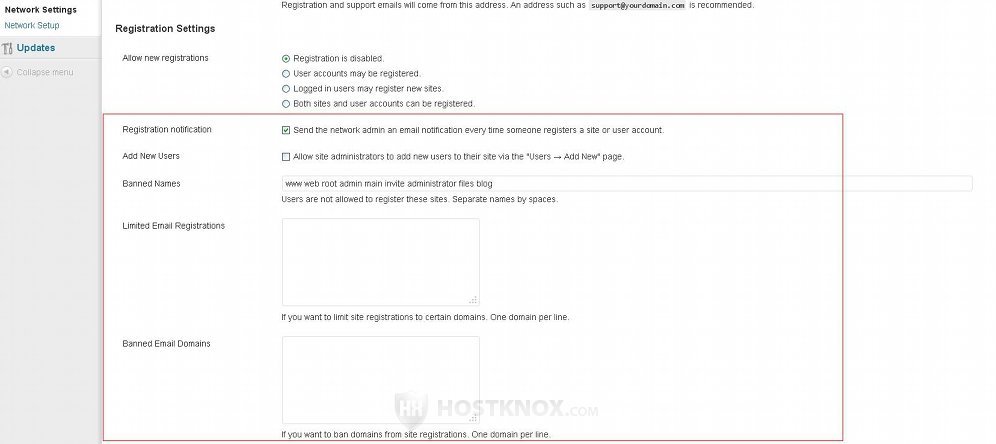
- Registration notification - this option consists of a checkbox with the description Send the network admin an email notification every time someone registers a site or user account. It's pretty much self-explanatory. The option is enabled by default. When a new user or a new site is registered, regardless of whether that happens from the frontend or from the admin panels of sites in the network, a notification email message is sent to the network admin email. Note that these messages are sent to the network admin email that's specified in Settings menu>Network Settings of the network admin panel. It's not to be confused with the email address of the super admin user that's created during the multisite installation. By default, these two email addresses are the same but if you want to, you can specify a different one for the super admin user and for the network admin email. If you want to disable such notifications, unmark the checkbox.
When a super admin creates a site from the network admin panel a notification message is sent to the network admin email no matter whether the Registration notification option is enabled or disabled. - Add New Users - this checkbox is unmarked by default. It's also labeled as Allow site administrators to add new users to their site. When this option is disabled admins of individual sites in the network cannot add new users from the Users sections of the admin panels of these sites. They can only add existing users that are registered either from the network admin panel or that are registered from the admin panel of another site in the network by a super admin. So new users can be registered only by super admins either from the network admin panel or from the admin panels of sites in the network. If you want administrators of sites in the network to be able to add new users to the particular site that they manage, mark this checkbox.
- Banned Names - this is a list of names that cannot be registered as sites in the multisite network. There are some names that are included by default (www, root, web, admin, etc.). These names correspond to the subdirectory or subdomain part of the URLs (depending on whether your multisite is configured to add sites as subdirectories or subdomains) of sites. For example, if your main site is yourdomain.com and you have set up your multisite to add sites as subdirectories, new sites will have the URL structure yourdomain.com/site1. If you put the word example in the Banned Names field, then users will not be able to create the site yourdomain.com/example. Separate the banned names in the field with spaces.
Note however that these banned names concern only the sites that are created by registered users (such sites are added from the frontend). As we already explained when describing the previous network options, registered users cannot add sites by default. So if you allow users to create new sites in the network, these banned names will be checked when a user tries to add a site. If the name of the site is in the list with banned names, it will not be created and the user will see a message informing them that the name is not allowed. The banned names do not apply to sites that are created by super admins from the network admin panel. - Limited Email Registrations - as you know when you or other admins register users, or when people register themselves (if frontend registration is enabled), a username and an email address for the new user have to be provided. With this option you can allow only users with emails belonging to particular domains to be able to register on the sites in your network. For example, if you put gmail.com in this text area, only people who provide a Gmail email account will be able to register on any site in the network. This is valid not only for registrations performed on the frontend but also for registering users from the admin panels of the sites in the network or from the network admin panel. You can put many domains in this list; just type each one on a new line. The option applies only to new registrations. People who are already registered will not be affected.
Note that this option does not affect the registration of new users when new sites are added to the network from the network admin panel. As you know when a new site is added from the network admin panel you have to specify an email address for the admin of that site. If there's no such email address in the database, WordPress automatically creates a new user. This type of user registration will not be affected by any domain limitations set on email registrations. - Banned Email Domains - this is similar to the previous option but this time the listed domains are banned. People cannot be registered if the provided email address belongs to any of the domains listed in the text area Banned Email Domains. For example, if you put gmail.com in this text area, no one who provides an email account belonging to Gmail (e.g. example@gmail.com) will be able to register on any of the sites in your multisite network. As with the previous option this works not only for user account registrations from the frontend but also for registering users from the admin panels of the sites in the network or from the network admin panel. This option affects only the registration of new users. Users who are already registered but have an email account with a domain that you've decided to ban after their registration will still be able to log into the site.
Similarly to the previous option, this option doesn't affect the registration of a new site admin when adding a new site from the Sites section of the network admin panel. The new site admin will be registered as a user even if the specified email address belongs to a banned domain.
If you make any changes don't forget to click on the Save Changes button at the bottom of the page.
New Site Settings
This group contains settings for changing the templates of welcome email messages and also of the first post, page, comment, etc. that are published automatically as examples on new sites when they are added to the network. The first two options are text areas that contain the default welcome messages that are sent to newly registered users and also the messages sent to confirm the creation of sites:
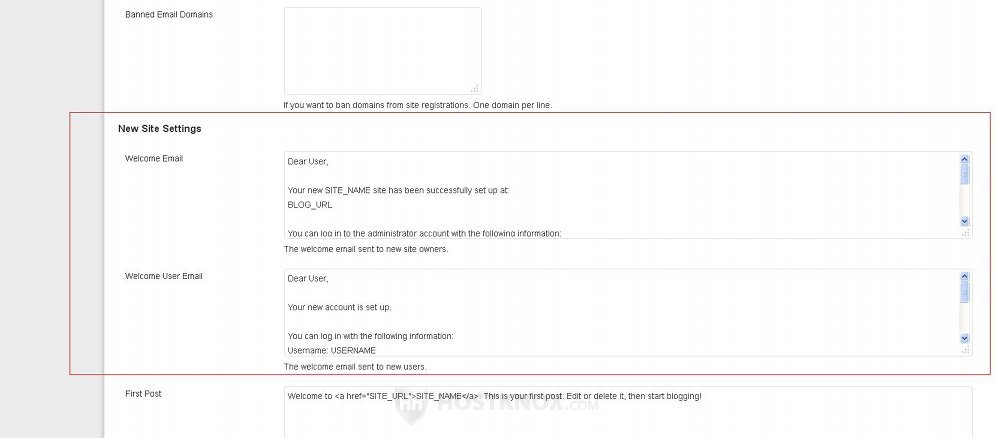
The welcome message options are:
- Welcome Email - this is the message that's sent when a new site is added to the multisite network. You can edit its default text but be careful with variables such as BLOG_URL, SITE_NAME, USERNAME, PASSWORD. In the actual messages sent to users they are replaced with the particular values. If registered users are allowed to create sites, the message is sent to the email address of the user who created the site. Note that in such cases the user first receives a message with an activation link. Only after they visit this link will they receive the welcome email.
If a super admin creates a site from the network admin panel and the email address specified when creating the site is one of an existing user, then that user will receive this welcome message informing them about the creation of the new site, and it will also contain the login credentials of the user (although as an existing user they have them already). If the super admin creates a site and specifies an email address that doesn't exist in the database, then in addition to the site a new admin user will be created. So on that email address the user will receive a message with the login credentials for the new user account and a welcome message for the new site. Note that in such cases the welcome message for the user account registration is not the same as the one that can be changed with the Welcome User Email option (the next one described in this tutorial); it's a message that contains only the username and the password and nothing else.
If the Registration notification option on this same page is enabled (it's enabled by default), when a new site is registered a notification will also be sent to the network admin email. If the option is disabled such a notification will be sent only when a site is created from the network admin panel (by a super admin). This notification message has a different content than the welcome email sent to users. It only contains the name of the created site and its URL address. - Welcome User Email - this is the email message that's sent to newly registered users. You can edit it the way you want. The variables USERNAME, PASSWORD and LOGINLINK are replaced with the relevant information in the actual messages.
There are a few things to keep in mind. First, if a user is registered from the network admin panel (by a super admin), then this is not the email message that's sent to the user. In this case the message contains only the login credentials.
When the user is registered from the admin panel of an individual site in the network, there's an option to skip email confirmation. It's disabled by default which means that first the user receives an email with a confirmation link, and after they click on that link they'll receive the welcome user email. If the option for skipping email confirmation is enabled, then the user receives directly the welcome user email.
If you have allowed user registration on the frontend, a user who registers on the frontend first receives an email with a confirmation link and after the user visits the link they receive the welcome user email.
The next several options in this group are for editing the first post, first page, etc. that are automatically published on new site:
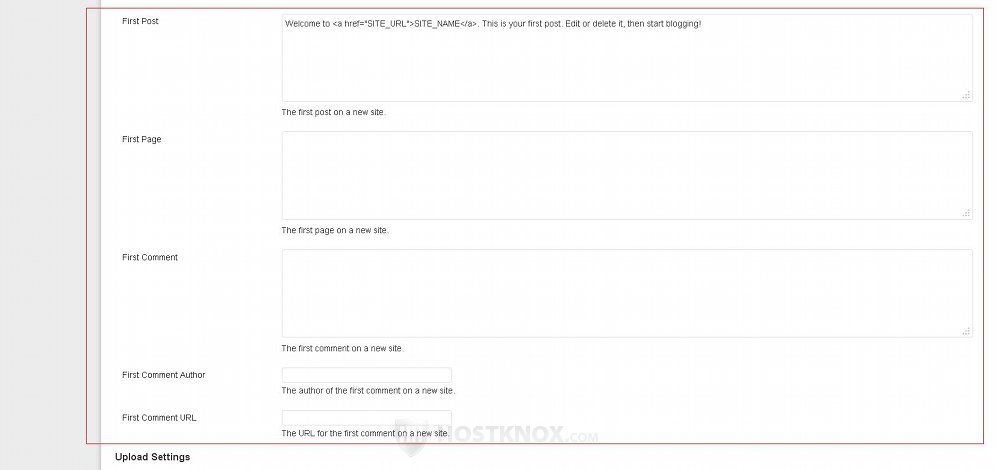
These options are:
- First Post - when a new site is added to the multisite network on its frontend an example post is published by default. The post has the title Hello world! and some example content. In the First Post text area you can see and edit the content of this example first post. It's the same for each site that's created in the network. If you delete the content and leave the text area empty, a first example post will still be published on new sites. It will only have a title and no content.
- First Page - on every new site that is added to the network an example static page is published. It has the title Sample Page. In this text area you can type a content for that page. By default, this text area is empty so the sample page doesn't have any content.
- First Comment - the first example post that's published on every new site in the network also has one example comment. By default, the comment doesn't have any content. In this text area you can type some text for the first example comment.
- First Comment Author - this is the name of the author that's shown next to the first example comment. By default, this field is empty so the comment author is labeled as Anonymous. If you want some other name to be shown as the author of the automatically published sample comment, type the name in this text area. It can be any name you want.
- First Comment URL - this field is empty by default. If you want the name of the comment author to be a link, type the URL in this field.
Upload Settings
This group consists of a few settings with which you can limit the total size of uploaded files, the maximum allowed files size of a single file, and you can specify what types of files can be uploaded:
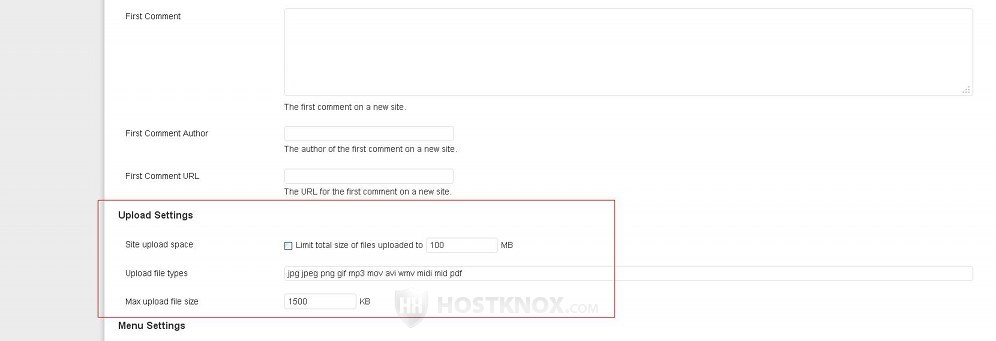
Let's have a look at the options:
- Site upload space - this consists of a checkbox with the description Limit total size of files uploaded to immediately followed by a text field in which the total size (in megabytes) is specified. By default, the checkbox is unmarked which means that the option is disabled and respectively there's no limit to the total size of the uploaded files. If you want to set a limit mark the checkbox and type the number for the total size in the text field (by default, it's set to 100 MB). Note that the total size limit is not for the whole network; it's for each site in the network. So, for example, if you set it to 50 MB, each site in the multisite network will have a quota of 50 megabytes for the total size of the uploaded files. Once the quota is reached file uploading will be disabled. If you set a quota, it will be indicated on the homepage of the admin panel of each site (in the window labeled Right Now).
- Upload file types - in this text field are listed the file types that are allowed. If a file type is not in this list, users will not be able to upload files from that file type. The file extensions are put in this field (e.g. jpg, jpeg, png, etc.). Separate the file types with a space.
- Max upload file size - this is the maximum file size that's allowed per file. If the file that the user wants to upload is bigger, they will not be allowed to upload it. It's set in kilobytes. By default, it's 1500.
Menu Settings
This section includes only one option:
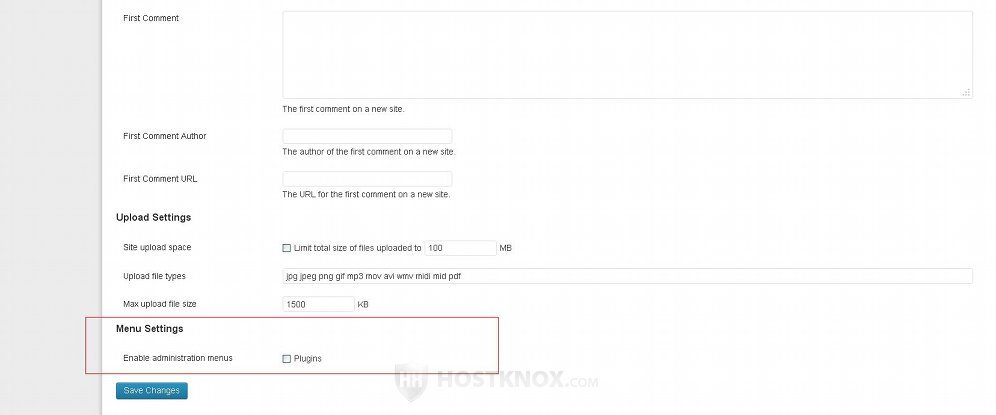
You can configure the following setting:
- Enable administration menus - this option actually consists of a checkbox labeled Plugins. By default, this checkbox is unmarked. This means that the Plugins section of the admin panel of each individual site is accessible only to super admins/network admins; site administrators don't have access to it. Plugins in a multisite installation can be installed only from the network admin panel. Then super admins can activate/deactivate plugins for the whole network from the network admin panel. Deactivated plugins can be activated on a per site level from the admin panel of the particular site. By default, this can be done only by super admins. Administrators of individual sites don't have access to the Plugins section of the admin panel to which they have access. If you mark the Plugins checkbox on the Network Settings page, administrators will be allowed to activate and deactivate installed plugins. They can do this from the Plugins section of the admin panel of the site which they are allowed to manage.
If you make any changes to the network settings don't forget to click on the Save Changes button at the bottom.
You may also find useful the following WordPress multisite tutorials:
- how to install and set up a multisite network in WordPress
- how to manage a multisite network in WordPress (a detailed look at the network admin panel)
- how to manage domain mapping in WordPress multisite