WordPress Media Library Tutorial
How to manage the media library in WordPress
The admin panel of your WordPress has a media library which you can use to add, edit, organize and manage videos, audio files, images, text files and other media files regardless of whether these files are actually available/displayed in a post or on a static page on the frontend of your site.
In this tutorial we'll present a general overview of the media library with its options and settings with a brief mention of how to add media files. Since on the add and edit forms for media files there are quite a number of extra options we've included a separate tutorial on adding and editing media files. There you can find a more detailed description of how to add and edit media files and on the various settings associated with that. For more information check out the tutorial on adding and editing media files in WordPress.
The WordPress admin panel also contains some system media settings. These are reviewed in the section on managing the system media settings in WordPress in this tutorial.
We suggest that first you start with this tutorial to get a general feeling of the media library.
Table with Existing Media Files and Screen Options
To access the media library, log in to the admin panel of your WordPress and go to Media menu>Library sub-menu. On the page that opens you'll see a table with the media files that are currently in the media library. The table is made up of several columns: File, Author, Uploaded to, Comments, Date.
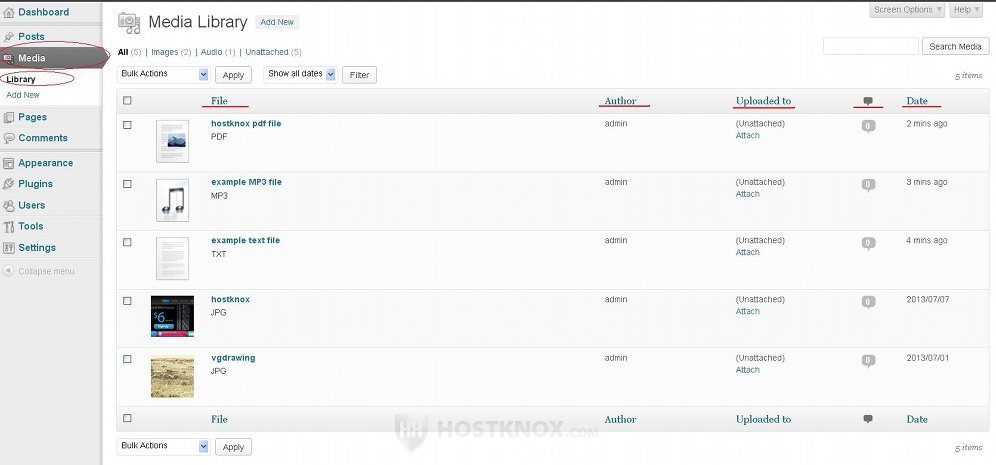
In case the file is an image a thumbnail of the actual image is shown next to its name.
Each column shows the respective information for the particular media file. The File column displays the name of the file and the file type (e.g. JPG, PNG, PDF, MP3, etc.). The file name is a link that redirects to the edit form on which you can modify the settings of the file. The Author column shows the user who uploaded the file in the media library.
The column Uploaded to displays the post or page with which the file is associated. Note, however, that even if the column shows Unattached for a particular file, this doesn't necessarily mean that the image or a link to the file (if it's not an image file type) is not included in a post or on a static page on the frontend of your site. In case the column shows Unattached you'll also see a button Attach. If you click on it a small window will pop out with a list of your posts and pages. You can select a post or a page and attach the file to it. This, however, may not produce the result you expect on the frontend. To be sure that the image or a link to the file is displayed in the content of the post/page, you can add it from the settings of that post or page. For more information check out the tutorial on adding media files in posts and pages in WordPress. In short the Uploaded to column might mislead you as to what is shown on the frontend.
The Comments column shows the number of comments for each media file. Each number is also a link that displays a list of the actual comments. As we mentioned, media files can be included in posts and static pages, but each file also has its own permalink and a corresponding page on the frontend. On that page only the file is listed even if otherwise it's included in the content of a post or a static page. On this very same page visitors can post comments regarding the file (provided that comments are allowed) and these are the comments listed in the Comments column of the table with the existing media files. The last column is Date and as the name suggests it shows the date on which the media file was uploaded.
With the exception of the File column you can remove or display again the other columns. To do this click on the Screen Options button in the upper right corner. A panel with checkboxes will appear. To remove/show a column unmark/mark its checkbox:
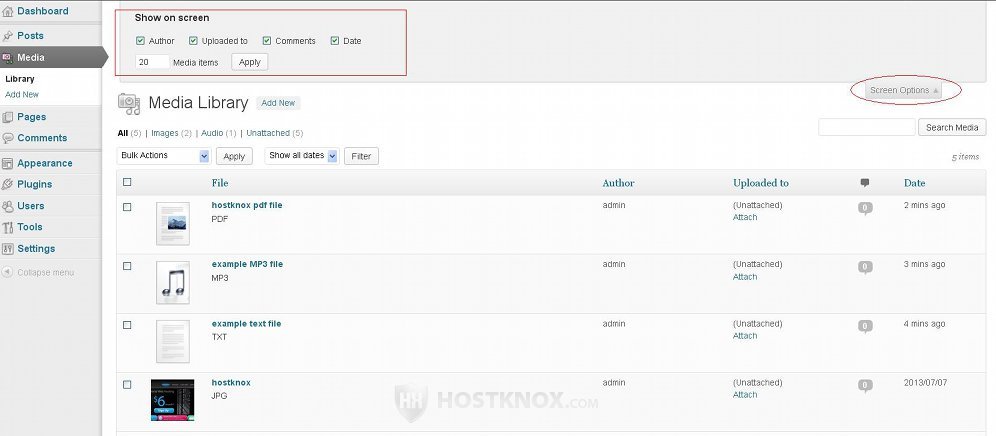
You can also change the number of media items shown on each page in the table.
Bulk Actions
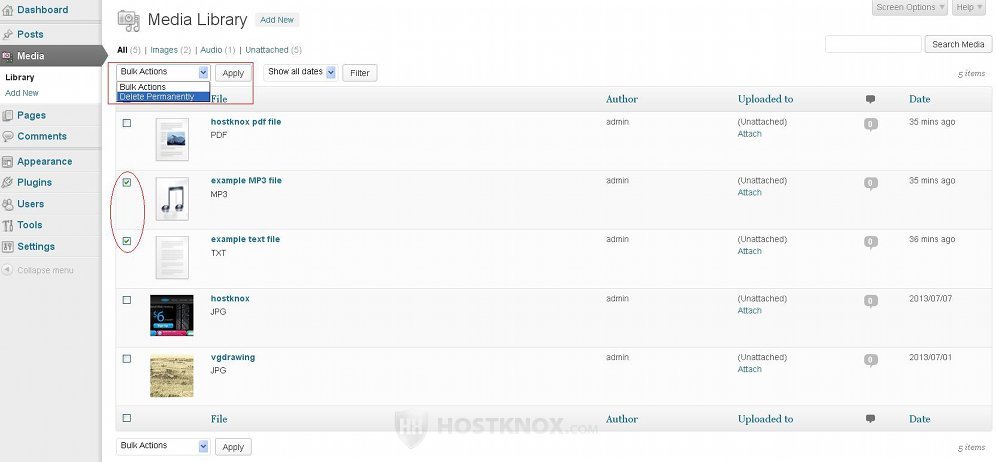
If you want to delete more than one media file at the same time, you can use the Bulk Actions drop-down menu. There's one above the upper left corner of the table listing the existing media files, and another one below the bottom left corner of the table. Mark the checkboxes corresponding to each file that you want to delete, select Delete Permanently from the drop-down menu and click on the Apply button next to it:
Individual Actions
When you hover the mouse cursor over a row in the table with the media files a few buttons will appear. With these buttons you can perform actions with that individual file:

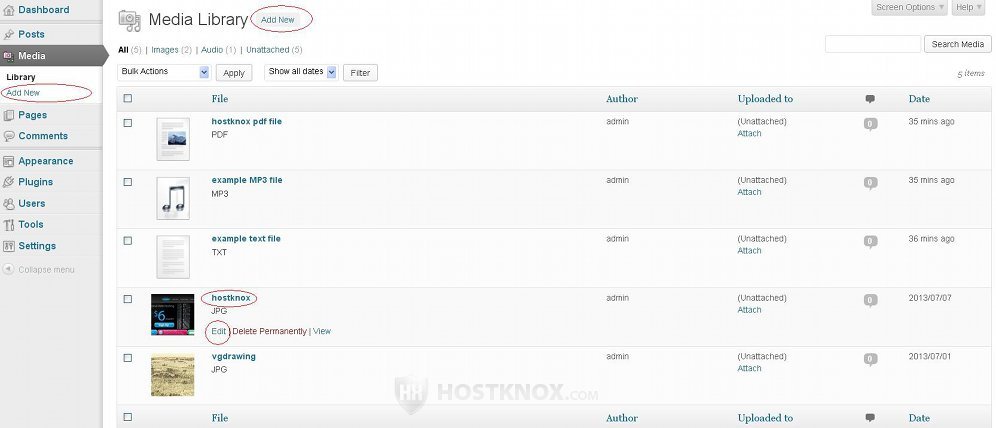
You can delete the file with the button Delete Permanently. The View button will open the permalink of the file. That's the page on the frontend dedicated to the particular file (it's not the post or static page on which the file is included). The Edit button will open the form on which you can edit all the settings associated with the file. For more information on editing media files read the tutorial on adding and editing media files in WordPress.
Adding and Editing Media Files
To add new media files, open the media library section in the admin panel and click on one of the two Add New buttons. There's one in the menu on the left and another one in the top left corner of the page. To edit an existing file either click on its name in the table or hover the mouse pointer over its row and click on the Edit button that appears:
Don't forget that you can add files to the media library directly while adding/editing a post or a static page.
As we already mentioned, we have a separate tutorial on adding and editing media files in WordPress.
System Media Settings
There are also some system settings related to the media files. To modify them, in the admin panel go to Settings menu>Media sub-menu:
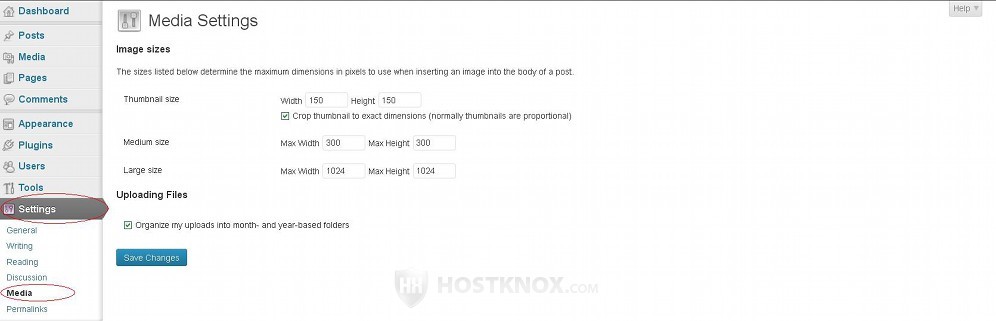
They are mainly for the dimensions of the different image sizes. When you upload a new image WordPress automatically creates copies resized according to the dimensions for the three different sizes (e.g. thumbnail, medium, large). Of course, if, for example, the original images is smaller (in terms of dimensions) than the large size, then a large size copy is not created. The size that is used depends on the particular place where the picture is displayed. For example, WordPress automatically uses the medium size when a picture is inserted into the content of a post.
There is also an option for organizing the uploads on your hosting account into month and year based folders. This option is enabled by default. Assuming that your WordPress is installed directly in the public_html folder on your WordPress hosting account, the path on your account to the folder where files are uploaded and stored will be public_html/wp-content/uploads. When the option for organizing the uploads into month and year based folders is enabled, WordPress automatically creates folders for the year and month and puts the uploads in the corresponding folders. For example, all the files that you upload in July 2013 will be put in public_html/wp-content/uploads/2013/07. If the option is disabled, all files will be put directly in public_html/wp-content/uploads without organizing them into any further subfolders.