WordPress Transfer Tutorial
How to transfer WordPress to a new host
In this tutorial we'll go over the process of transferring your WordPress installation from one hosting account to another. This works for transfers between two different hosting accounts within the same hosting company as well as for transfers from one host to a different host.
Free Website Transfer from HostKnox - get our WordPress hosting plan and have our WordPress specialists take care of transferring your website for you at no additional cost.
Before you begin make sure you have a recent backup of the WordPress files and database.
If you are going to move only the application and you are not going to change the domain name used to access it, then you can skip the section in this tutorial about changing the site URL and go straight to the one about moving your WordPress.
If in addition to moving to a new hosting account you're also going to use a different URL address for your site, then you should start with the first section which is about changing the site URL address.
Changing the Site URL
Before you move your WordPress to the new hosting account, and in particular before you export the database, you should change the URL of the site so that it corresponds to the new one which will be used to access your site on the new hosting account. You only have to do this if you are going to use a new domain name. So, for example, if your old WordPress site has the address example.com and you are not going to change that domain name, so that the new site is accessed with the same URL, then you don't have to go through the things described in this section of the tutorial.
If the URL of the old site is, for example, example.com and you're going to use a domain example2.com for the transferred site, then you have to change the site URL before you export the old database. You can do this from the admin panel of the old site. After you log in go to Settings menu>General sub-menu. On the page that opens find the options WordPress Address (URL) and Site Address (URL):
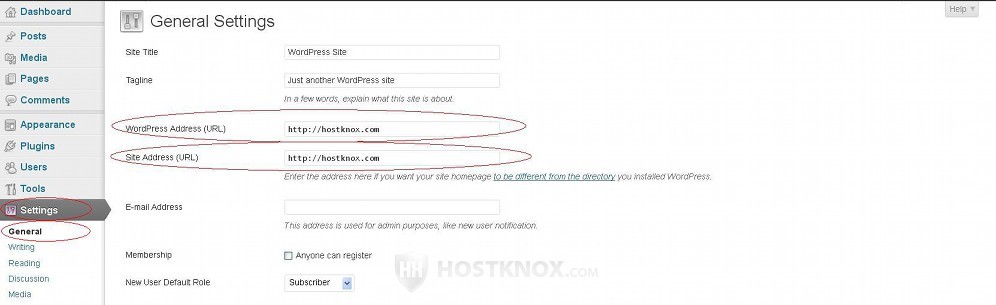
Change the URL address for both so that it corresponds to the one that will be used to access the site after you move it to the new hosting account. After you type the URLs don't forge to click on the Save Changes button at the bottom of the page.
The reason that you have to do this before you export the database of the old site is that when you make the changes to the above describe options of the admin panel, the URL address will be updated with the new one in the database. So after you import the database to the new one it will be up-to-date with the new URL address. Note that even if you forget to change these a couple of options, you can do it after you import the database into the new one. You can do this by directly modifying a couple of things in the database. This can be done with phpMyAdmin. For more information on this read the section of this tutorial on manually changing the URL address in the database (it's the last one).
Keep in mind that you should make the above described URL changes even if you're going to use the same domain name, but the URL of the old site is different from that of the new one. What's meant by this is that either the old or the new site is installed in subfolder. For example, the old site is accessible at example.com but you want the new one to be accessible at example.com/wordpress (which means you're going to transfer it to a subfolder called wordpress on the new hosting account); or, for example, the old site is accessible at example.com/wordpress but you want the new one to be accessible at just example.com. In such cases you should change the URL address from the admin panel before exporting the database of the old site.
You shouldn't do this only when the same domain name is used and when both sites are installed either in the root public_html folder on both hosting accounts, meaning both are accessible at example.com, or both sites are installed in a subfolder with the same name (e.g. both are accessed at example.com/wordpress).
In any case you can always change the URL options directly in the database at any time as described in the last section of this tutorial.
Moving the WordPress Files and Database
- First, you have to download the WordPress files and folders from your old hosting account to your local computer.
- After that upload them on your new WordPress hosting account.
There are different ways you can do this. The most frequently used method is to do it with an FTP client. For more information on backing up your files with an FTP client check out the tutorial on how to back up your website. There you'll also find information on exporting a database using phpMyAdmin.
Another way you can download and upload files is via SSH. For more information check out the tutorial on how to upload and download files through SSH.
Note that whether you do it through FTP or SSH it's quicker if before you download the WordPress files and folders you archive them into a single file. After you upload the archive on the new account you can unpack it directly there.
- Export the database from the old hosting account to your local computer.
You can do that with phpMyAdmin. For more information check out the tutorial on how to back up a website. The second part of the tutorial is about exporting databases with phpMyAdmin.
Before actually exporting the database you should take into account whether you will use a new domain name to access the WordPress site on the new account. If that is the case, before you export the database you should log into the admin panel of the old site, then go to Settings menu>General sub-menu and replace the old URL with the new one in the fields labeled WordPress Address (URL) and Site Address (URL). For more information on this read the section in this tutorial on changing the site URL.
- Go to your new hosting account and create a database with a separate user and password. HostKnox clients can do that from the Databases section of the HostKnox control panel.
If you create a user with the same username and password as the one used for the old database, you won't have to change the user credentials in the wp-config.php file later. We'll come to this a bit further down.
- Import the database that you downloaded on your local computer into the newly created database on the new hosting account.
You can do that again with phpMyAdmin. For more information check out the tutorial on how to import databases with phpMyAdmin.
Another way to export and import databases is via SSH. All HostKnox clients have a free SSH access. Keep in mind that if your database is a big one (e.g. over 60 Megabytes), you should export and import the database through SSH. For more information on how to do this read the article on how to import and export databases via SSH.
- The last thing to do is to edit the wp-config.php file on your new hosting account and update the database information there.
The file is in the root WordPress folder. So if the application is uploaded directly in the public_html folder on your hosting account, the path to the file will be public_html/wp-config.php. Actually you can edit the file either before uploading it on the new hosting account, while it's still on your local computer, or after that. From the Files section of the HostKnox control panel you can edit files directly on your hosting account without the need to download them on your local computer. Otherwise, you can edit them on your local computer. Use a text editor such as Notepad or Wordpad to edit files. After that you can upload it on your new hosting account replacing the old file (you can do that with an FTP client).
In the wp-config.php file you have to change the name of the database and the username and password of the database user so that they match those of the database and user that you created for the new account. In the file find the following lines:
// ** MySQL settings - You can get this info from your web host ** //
/** The name of the database for WordPress */
define('DB_NAME', 'example_databasename');

/** MySQL database username */
define('DB_USER', 'example-user');

/** MySQL database password */
define('DB_PASSWORD', 'example-password');

/** MySQL hostname */
define('DB_HOST', 'localhost');
Replace example_databasename with the full name of the new database, replace example-user and example-password with the username and password of the user that you created for the new database. With most hosting companies, including HostKnox, the value for DB_HOST is localhost so you don't have to change that.
Changing the Site URL Directly in the Database
If the site URL of the old site is different than that of the transferred one and you have forgotten to update it from the admin settings before exporting the database of the old site, you can make the change after the transfer by directly editing a couple of things in the database of the new site. You can do this with phpMyAdmin.
You can access phpMyAdmin from the Databases section of the HostKnox control panel. There's a phpMyAdmin link in the black panel on the right. Inside phpMyAdmin find the name of the database in the left frame and click on it:
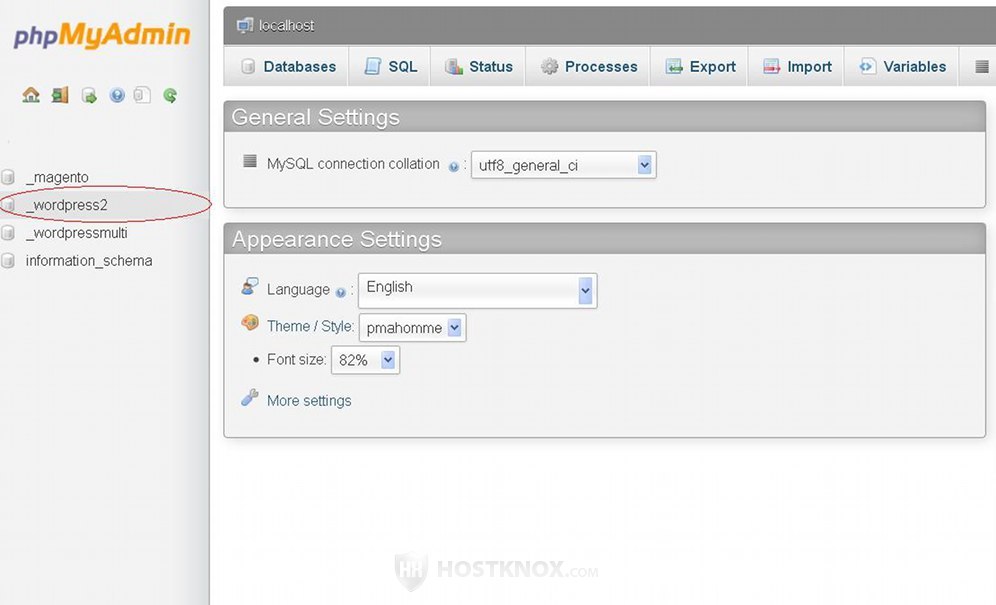
This will display its tables in the right frame. Find the table named wp_options and click on the name. The default wp_ table prefix might be different (if you have changed it during the installation, as is the case in our example):
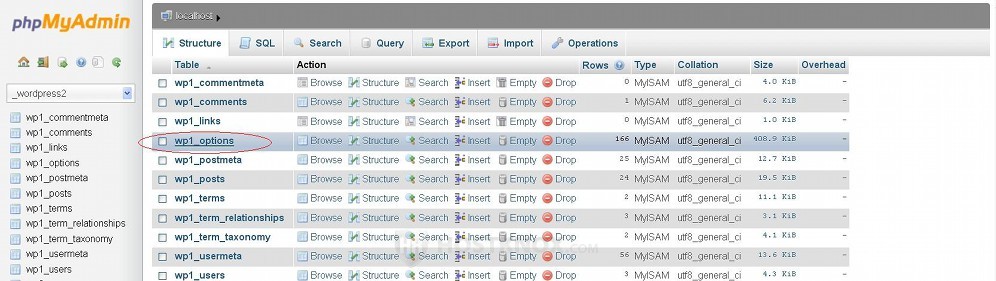
After you click on the name of the wp_options table on the next page you'll see its content. Look in the option_name column and find the one with the name siteurl (it should be the first one). Then click on the Edit button that's in the same row:
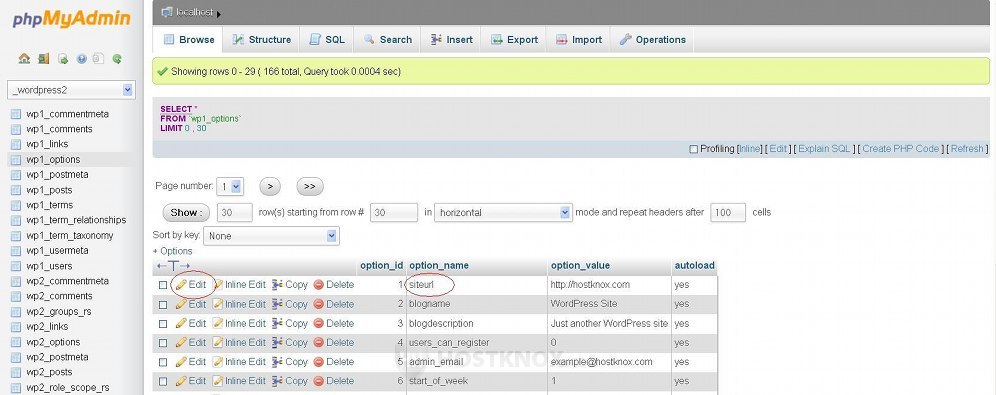
On the page that opens edit the URL address and click on the Go button:
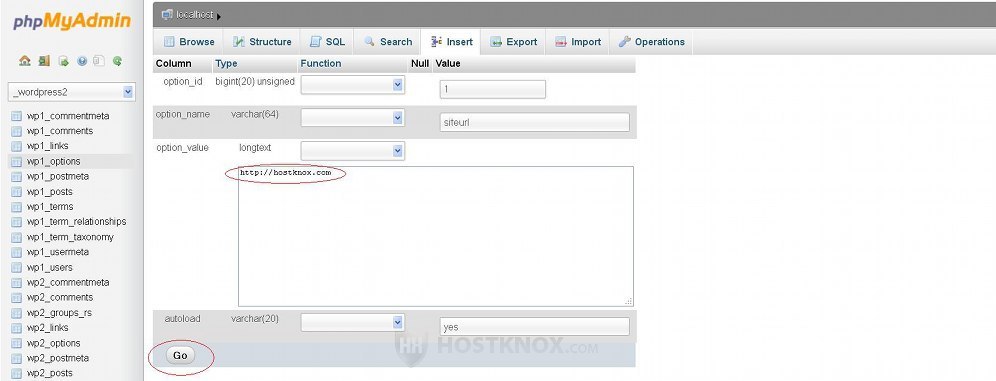
Once you click on the Go button the URL address will be updated and you'll be brought back to the content of the wp_options table.
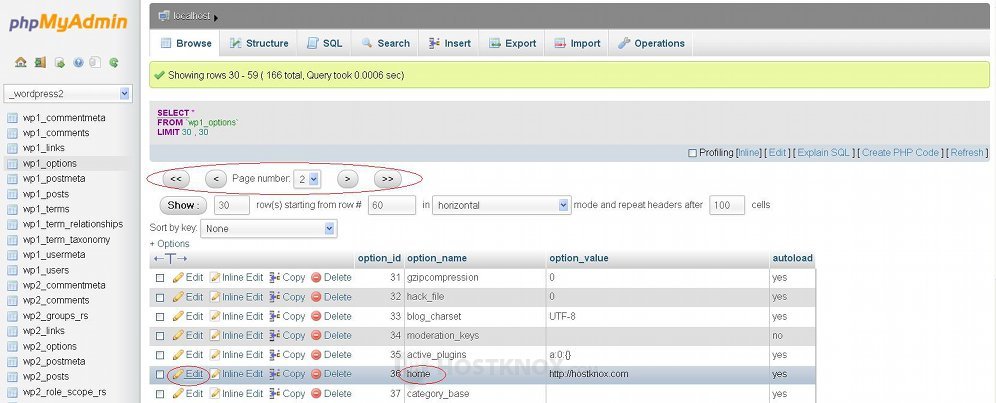
Then find the table row that has home for option_name and repeat the same thing. Note that there are several pages with options and you may need to look on the other pages to find that row. It will probably be on the second page. You can use the drop-down menus that are above and below the table, as well as the arrows next to them, to navigate through the pages:
Once you update the home and siteurl rows with the appropriate URL address you should be able to access your WordPress site.