WordPress Post Form Settings Tutorial
How to manage the post settings and blocks on the add and edit form in WordPress
When you add or edit a post there are different blocks with settings that you're not required to configure in order to publish/update the post. However, these settings can be very useful in managing your posts.
For basic information on adding and managing posts first you can read the tutorial on managing posts in WordPress. In this tutorial we'll have a more detailed look into the blocks and settings on the add/edit post form.
Screen Options and Block Positions
On the right side of the add/edit form there are several panels (e.g. Publish, Format, etc.) with different post options. By default, there are only a few panels but you can add more or remove some of the existing ones. To so this click on the Screen Options button that's in the upper right corner of the page to expand a panel. Those blocks that are shown on the add/edit form have their checkboxes marked:
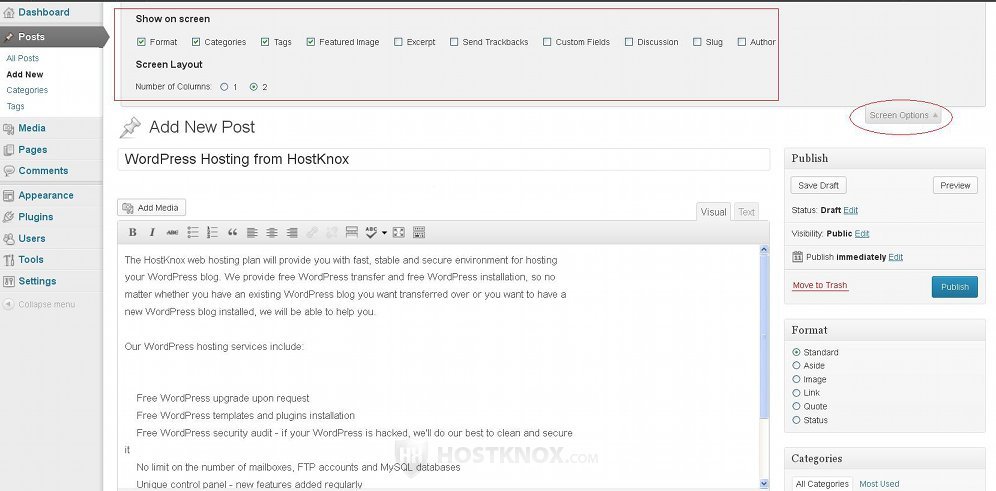
As you can see there are blocks that are hidden by default (e.g. Excerpt, Discussion, etc.). To hide or show a block simply unmark/mark its checkbox. From the screen options you can also change the layout. You can choose whether the blocks are to be displayed in two columns or in one. When you hide/show a block this will affect the add/edit forms of all posts not just of the particular post that you're adding/editing.
Note that you can also rearrange the positions of the blocks on the page. For example, the Publish block is displayed above the Format block, but if you want to, you can change that. To do this hover the mouse pointer over the title of the particular block until it turns into a four-arrow cursor. Then click and hold the left mouse button, and drag and drop the block into the desired position:

Now let's go over the different blocks and the options they contain. The blocks, both hidden and displayed by default, on the form for adding and editing posts are:
- Publish
- Format
- Categories
- Tags
- Featured Image
- Comments
- Revisions
- Excerpt
- Send Trackbacks
- Custom Fields
- Discussion
- Slug
- Author
Publish Block
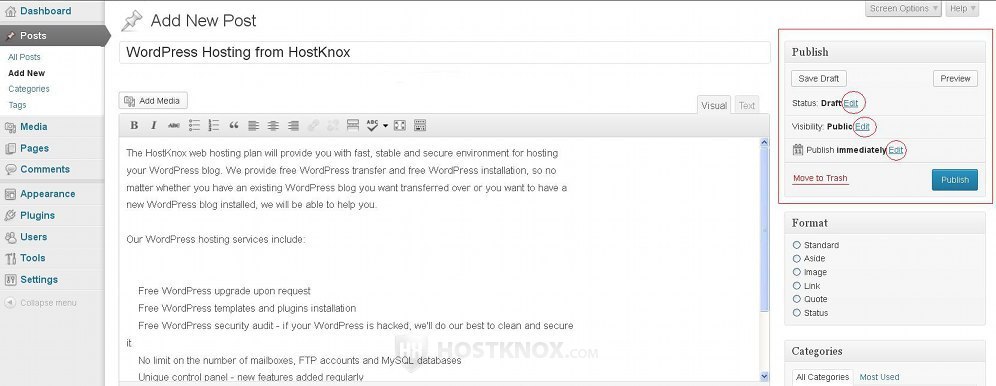
The Publish panel is the most important one. When you add a new post it contains the Publish button with which you can actually save and publish the post so that it's shown on the frontend. When editing a post the button is labeled Update. It also contains a few other options with which you can change the status and visibility of the post, and you can also choose whether to publish the post immediately or whether to set a specific publishing date. To configure these options just click on the Edit button that's next to each of the settings:
This will display some additional values for each option:
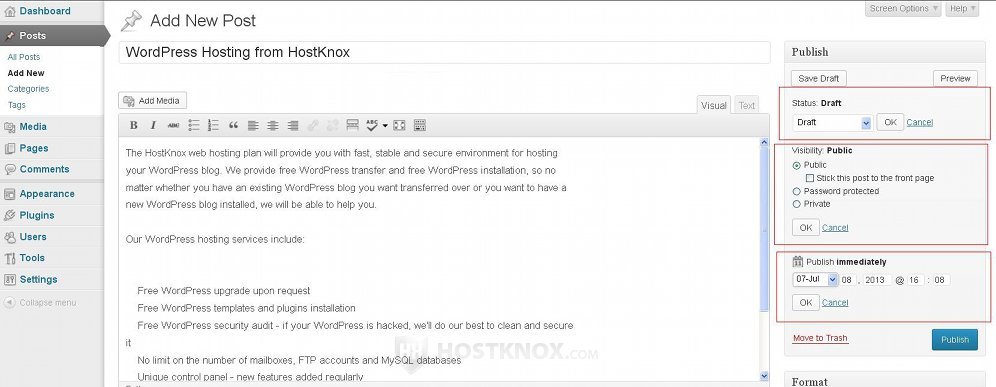
The first option is for the Status of the post. By default, when adding a new post it's set to Draft. If you don't change it and you click on the Publish button, the post will be published on the frontend and the status will automatically be changed to Published. However, if after that you edit the published post and you explicitly change its status to Draft (and you save the change), the status will be set to Draft and the post will not be published and visible on the frontend. The status can also be set to Pending Review in which case the post will not be shown on the frontend.
The Visibility option is set to Public by default. This means that anybody can view this post on the frontend. Under the Public radio button there's a checkbox labeled Stick this post to the front page. Each new post is shown at the top of the homepage of your site. When a newer one is published the older ones are moved down closer to the bottom of the page, and eventually are removed from the homepage to pages with older posts. If you want the particular post that you're adding/editing to be shown always at the top of the homepage mark the checkbox Stick this post to the front page. You can also set the visibility to either Password protected or to Private.
If you mark the radio button Password protected, a text field will appear under it and you have to type a password in that field. The post will be listed on the frontend but people will be able to see only its title. To view the content of the post they have to type in the field that's provided under the title of the post the password that you have set up. If you set the visibility to Private, visitors on your site will not be able to see the post on the frontend at all. It will be visible only to you and to other administrators.
By default, the post is published immediately. However, from the last option in the Publish block you can schedule it to be published at some point in the future. You can set an exact day and time and that's when the post will be published automatically.
The Publish block also has a Preview button. Clicking on it will show you how the post will look when published on the frontend. There's also a button Move to Trash with which you can put the post in the trash.
Format Block
The Format block is a block that's displayed on the add/edit post form by default. It contains a list of several radio buttons. The Standard one is marked by default:

The other options include Aside, Image, Link, etc. Actually the formats that are in the list depend on the theme that you use. Some themes don't support all formats. The format itself changes the way the post is displayed on the the frontend. For example, if you set it to Link and the post contains a link, the title of the post will not be shown on the frontend and the link itself will be display with a bigger font size. You can choose a format according to your needs and you can experiment with the different formats to see what the result is on the frontend. It might be different depending on your theme.
Categories Block
From the Categories block you can assign the post to one or more of your categories:
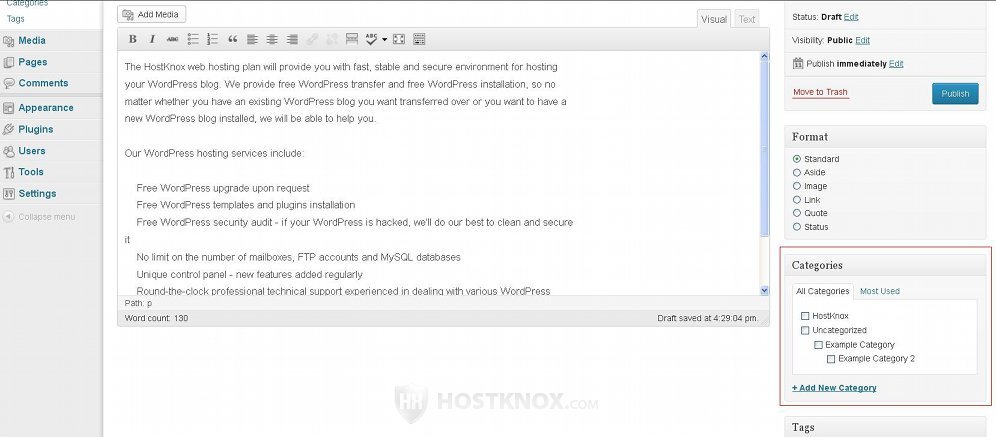
Although you're not required to do this it's a good way to organize your posts/articles. Just mark the checkbox(es) for the category or categories to which you want the post to belong. If you don't mark any category, the post will automatically be put in the default Uncategorized category. This is the category that comes preconfigured with WordPress and that can't be deleted.
If you want to add a new category click on the Add New Category button that's in the block. A text field will appear in which you can type the name of the category:
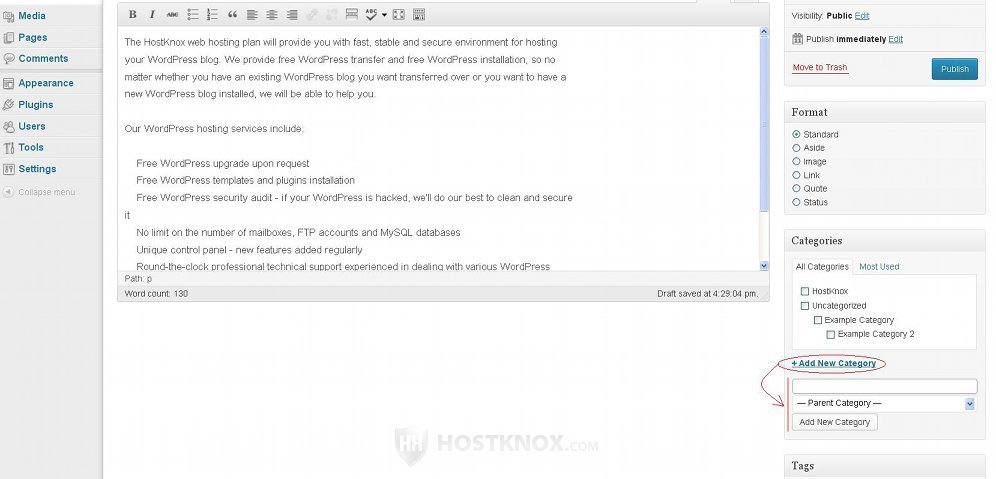
If you want the category to be a subcategory of another one, you can select the parent category from the drop-down menu. Then click on the Add New Category button that's under the field and the drop-down menu. In the admin panel you can manage your categories by going to the Posts menu on the left>Categories sub-menu.
On the frontend the name of the category to which a post belongs is usually listed under the content of the post. Some themes show it below the title. There's also a menu listing the existing categories. When a user clicks on a category link all the posts that belong to that category are displayed.
For more information on categories check out the tutorial on managing categories in WordPress.
Tags Block
Tags are another way for organizing and linking posts with similar content. A tag can be any word or phrase that relates in some way to the content of the post. You can add many tags per post. When you add or edit a post you can do this from the Tags block:
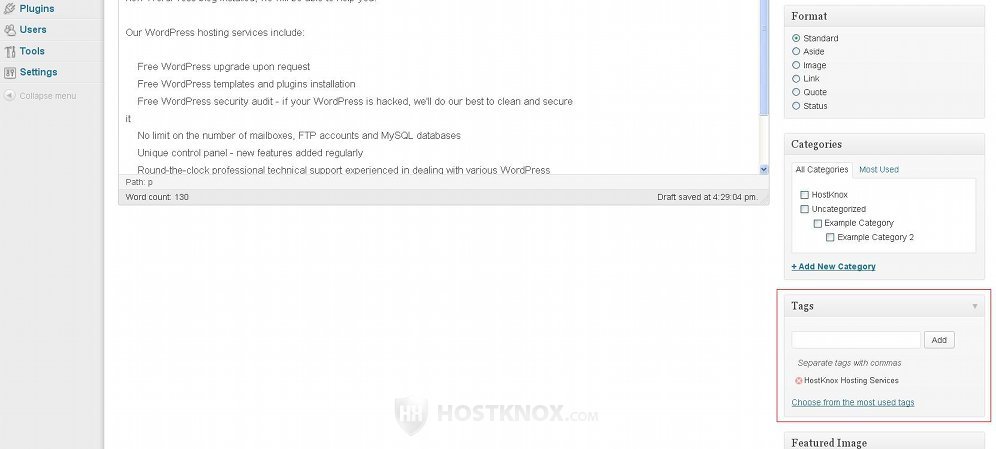
Type the tag(s) in the text field and click on the Add button. If you type more than one tag, put a comma between the tags. Of course, if the tag consists of more than one word, don't separate them with commas; otherwise, each word will be considered a separate tag. The tags that you add will be listed in the Tags block. To remove a tag click on the small x button that's in front of the tag.
In the admin panel you can manage all tags from Posts menu>Tags submenu.
On the frontend the tags are displayed under the content of the post or under its title, depending on the theme. Each tag is a link and if a user clicks on it, all posts that are tagged with the particular tag will be displayed.
For more information on tags read the tutorial on managing tags in WordPress.
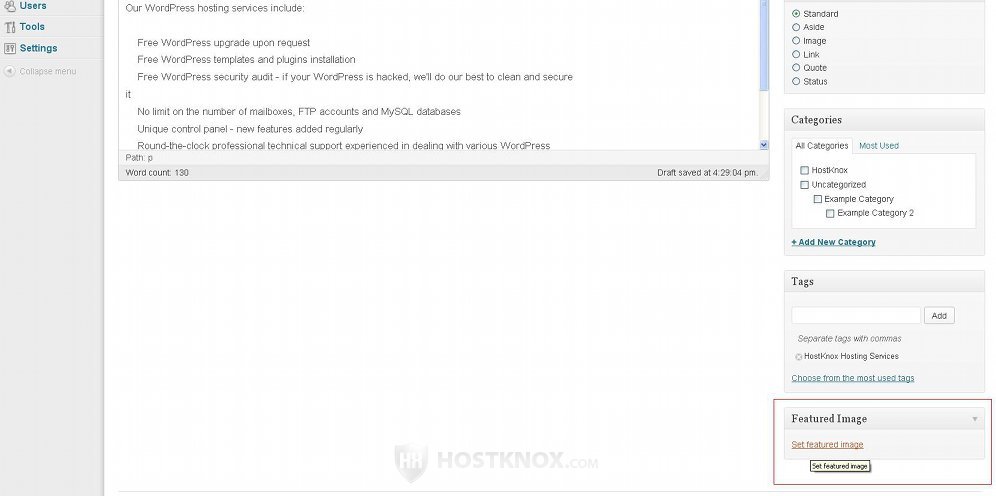
Featured Image Block
This is the last block that appears by default on the add post form. The featured image is displayed on the frontend above the title of the post. Some themes, however, are not configured by default to display a featured image. To add a featured image just click on the link Set featured image that's in the block:
After you do that a window will pop out displaying the images in your media library (if any). You can select one of the images and then click on the Set featured image button in the lower right corner of the window:
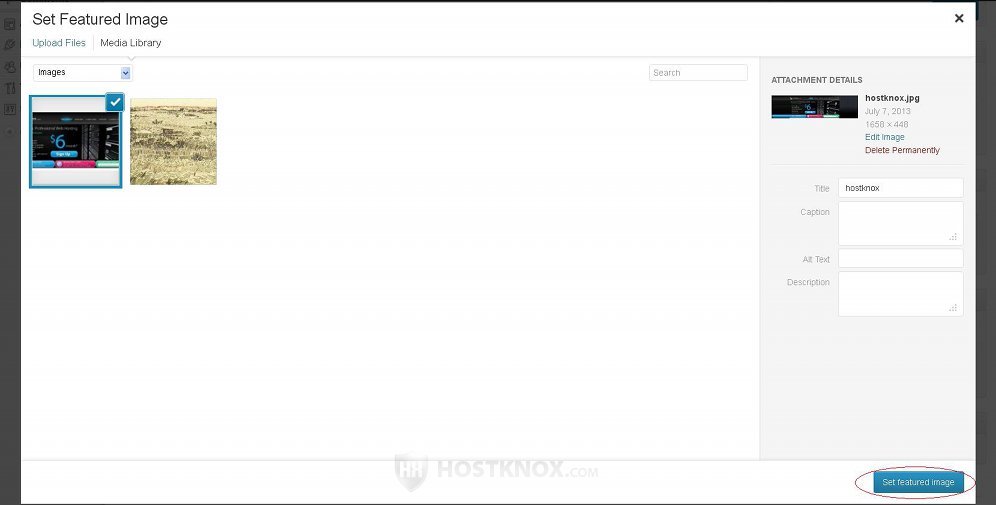
If you don't have images in the media library or you want to use one that's not there, you can upload an image from your local computer. Just click on the Upload Files button that's in the top left corner of the window, on the following page click on the Select Files button and find the image on your computer.
If the featured image is wider than the space on the frontend intended for posts, it will be scaled to fit into the container. Otherwise, the original dimensions will be kept. Once a featured image is set you'll see its thumbnail in the Featured Image block. You can change the image by clicking on the thumbnail or you can remove it by clicking on the button Remove featured image that's under the thumbnail in the block.
You can also insert images into the content of the post itself. For this purpose click on the Add Media button that's just above the built-in text editor on the add/edit post form. For more information check out the tutorial on how to insert images into posts in WordPress.
Comments Block
The panel Comments is not displayed by default when you add a new post, but it automatically appears once you publish the post. So by default it's displayed on the edit form of existing posts. It shows a list of the submitted comments for the particular post. When you hover the mouse pointer over a comment a few buttons will appear with which you can approve/unapprove, edit or delete the comment:
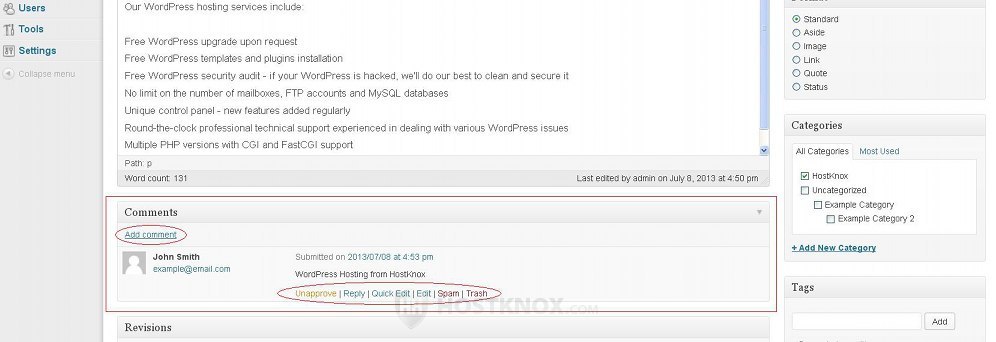
You can also add a new comment by clicking on the button in the top left corner of the block. A small built-in text editor will appear with which you can type and format the comment. Of course, you can manage all comments to any of the posts from the Comments section of the admin panel. For more information check out the tutorial on managing comments in WordPress.
Revisions Block
The block Revisions is not shown by default on the add form but as the previous one it's automatically displayed once the post is published. It lists all the revisions made to the post:
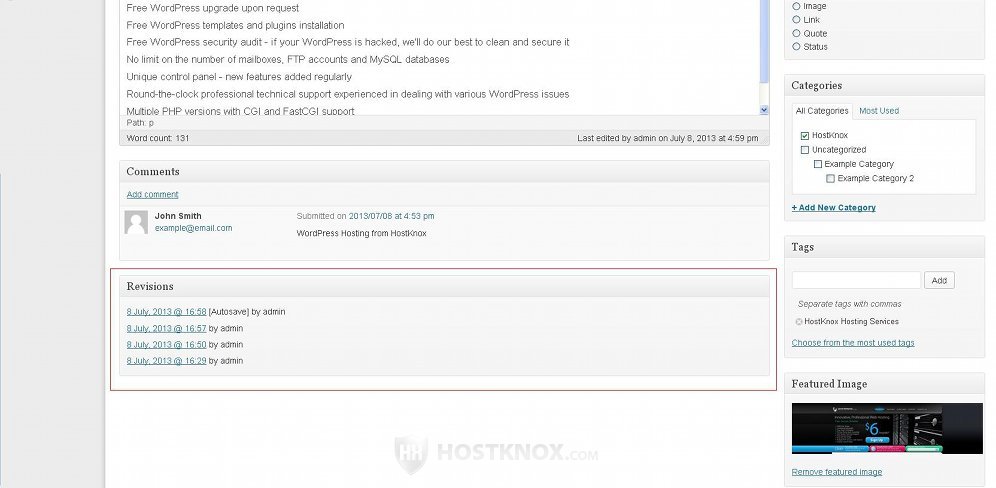
Each revision is a link. If you click on it, a new page will open. On that page you'll see the title and content of the post that correspond to the particular revision. Under that information there's a table that again shows all the revisions. Next to each revision there's a Restore button. If you click on it, the post will be updated according to the particular revision.
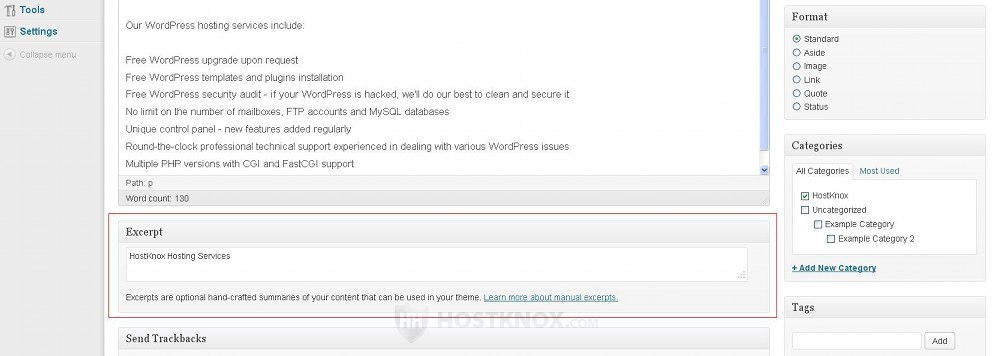
Excerpt Block
This is a block that's hidden by default. To see it on the add/edit form you need to mark its checkbox from the screen options as shown at the beginning of this tutorial. You can use this block to type a short summary of your post. You can do this in the text area that's provided in the block:
Where this summary will be shown on the frontend depends on the particular theme. With the default themes that come prepackaged with WordPress (e.g. Twenty Eleven, Twenty Twelve, etc.), for example, the excerpt is shown on search result pages. On other pages where posts are shown the full text is used. With other themes the excerpt can be shown on the general pages that list the posts, on category pages, on tag pages that list all the posts associated with a tag, on monthly archive pages that list the posts published in a particular month, and on pages on which posts are filtered based on the author of the posts. Some themes use the excerpt instead of the full text on all page types listed above, some employ only one type (e.g. search result pages), while others use a few.
The summary is also used instead of the full content of the post in RSS feeds. For this to happen, however, you also need to change one setting in the admin panel. Go to Settings menu on the left>Reading sub-menu and mark the radio button Summary for the option For each article in a feed, show.
Keep in mind that this manual excerpt is different than an automatically trimmed teaser. Some themes are configured to show only a certain number of words from the beginning of the post, if the post is longer than a specified number of words. The full content can be seen by going to the page of the post.
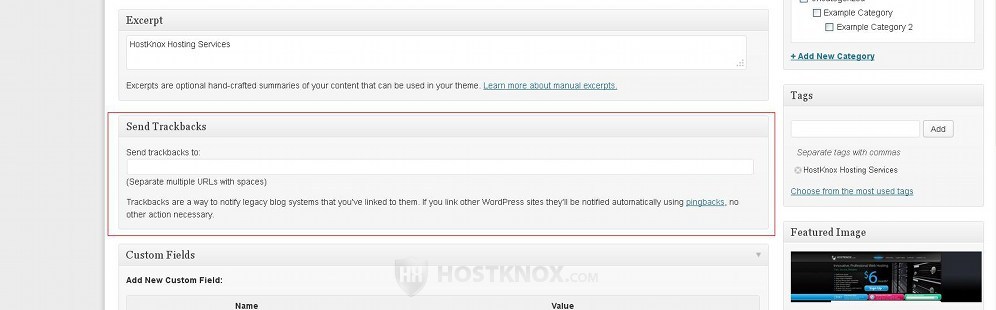
Send Trackbacks Block
The block Send Trackbacks is not shown by default. This is so because in practice you wouldn't really need it. Trackbacks and pingbacks are a way of automatically informing another blog site that you have a link on your blog to a post on that other blog. For example, you read an article on somebody's blog, you like that article and you decide to publish a post on your own blog and include a link to the post that you read on the other blog. With the help of trackbacks and pingbacks a link to your own post will be sent as a regular comment to the post of the other blog. The difference between trackbacks and pingbacks is that they use different technologies, and that pingbacks only send a link to your post, while trackbacks also send a part of the content of your post. Pingbacks, however, are considered safer in terms of security.
The reason why you shouldn't need the block Send Trackbacks is that pingbacks are sent automatically. There's no need to configure anything. You only have to make sure that a couple of options in your admin panel are enabled. Go to Settings menu>Discussion and make sure the checkboxes for Attempt to notify any blogs linked to from the article and Allow link notifications from other blogs (pingbacks and trackbacks) are marked (they are marked by default).
If for any reason you need to send trackbacks, after you enable the block on the add/edit post form type the URL in the text field:
Custom Fields Block
The block Custom Fields is hidden by default on the add/edit post form. As the name suggests it's used for including additional fields with information in your post. This information is also referred to as meta-data. In the block itself you can add a new name for the field (e.g. Company) and a value for that name (e.g. HostKnox):
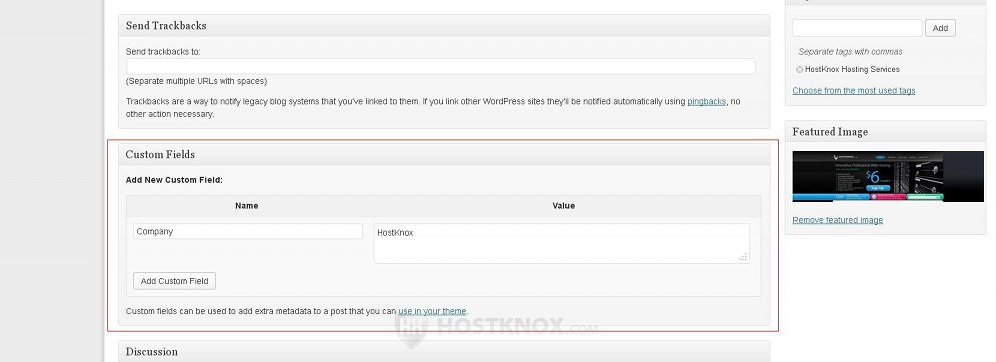
After that just click on the Add Custom Field button. On the frontend our example will be displayed as Company: HostKnox. You can add many fields and you can add the same name several times with a different value each time. Note, however, that in order for the custom fields to be displayed on the frontend some code modifications are required.
A safer and easier alternative for the average user is to make use of one of the plugins for adding and managing custom fields.
Discussion Block
By default, the block Discussion is not displayed on the add/edit post form. The block contains a couple of options: Allow comments and Allow trackbacks and pingbacks on this page.
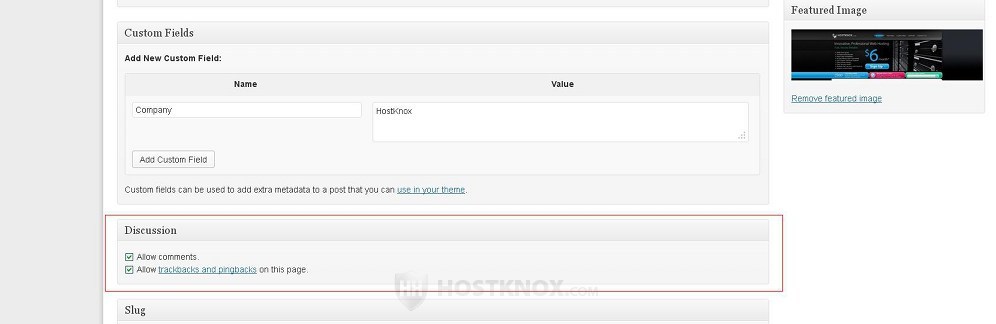
Both options are enabled by default. If you don't want people to be able to submit comments for this particular post and/or you want to disable trackbacks and pingbacks, unmark the respective checkbox. If you don't know what trackbacks and pingbacks are, check the section Send Trackbacks Block in this tutorial.
If you disable the comments function it will affect only the specific post. You can disable the function for many posts at the same time from the page in the admin panel that lists all the posts. You can also disable the function for all new posts. For more information read the tutorial on disabling comments in WordPress.
Slug Block
The Slug block is hidden by default. The slug is that part of the post's friendly URL that corresponds to the title/name of the post. Slugs are used with permalinks. Permalinks are used for turning the URLs of your site into friendly URLs that are easier to remember by people. Permalinks are disabled by default. A default URL to a post on your site will have the form yourdomain.com/?p=1. With permalinks enabled you can use a URL structure that includes the name of the post (e.g. yourdomain.com/post-name), or you can also use a structure that in addition to the name includes the date of publication (e.g. yourdomain.com/2013/08/16/post-name); there are also other possible structures. For more information on permalinks read the tutorial on WordPress permalinks.
When you publish a post the slug is automatically created based on the name of the post (lowercase letters are used and words a separated with hyphens). So, for example, if the name of the post is HostKnox Hosting, the slug will be hostknox-hosting. If you enable permalinks the slug will be used as part of the friendly URL (provided the URL structure includes the post name).
From the Slug block you can change the slug to anything you want:
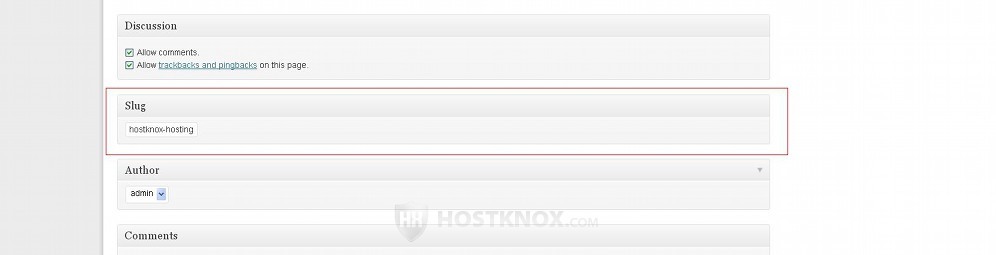
Just type the slug in the field and click on the Publish/Update button in the Publish block.
Author Block
The Author block is another block that's not displayed by default. This panel contains a drop-down menu from which you can change the author of the particular post (in case there's more than one user):
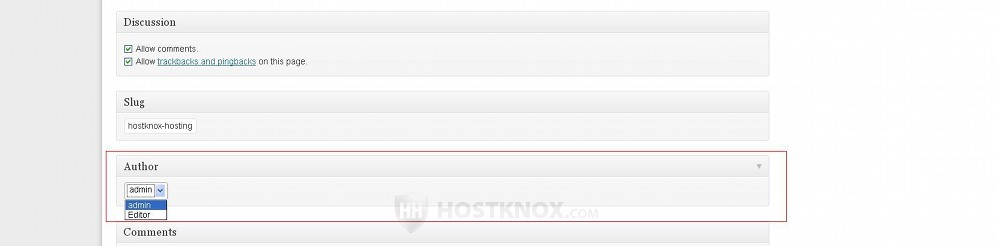
By default, the post is attributed to the user who creates it but from this drop-down menu the author can be changed. With most themes the author of the post is shown on the frontend by default either right under the title or after the content of the post, while some themes don't display the author. When the author is shown the name is usually a link; when a user clicks on that link all the posts written by the particular author are listed.
You can add and edit users and assign roles to them from the Users menu on the left side of the admin panel.