WordPress Security Tutorial
How to improve the security of your WordPress blog/site
Security is always an important issue that should be considered as an inseparable part of maintaining your WordPress blog/site. There are many more or less complex ways to make your blog more secure. Here we'll suggest some more basic ways on how to make your blog less vulnerable.
- Update your WordPress regularly. When you see that there is a new version it's advisable that you update your current version as soon as you can. When there is a new version you'll see a notification message on yellow background at the top of your Dashboard. Newer versions fix different issues, including security, and thus make your blog/site more difficult to hack. For more information on how to upgrade your WordPress you can check our WordPress Upgrade tutorial.
- When it comes to updates it's also a good idea to check for updates for the plugins you are using. You can do that from the Dashboard, too. You can check from the Updates section of your Dashboard for any updates (for WordPress itself, for plugins, themes):
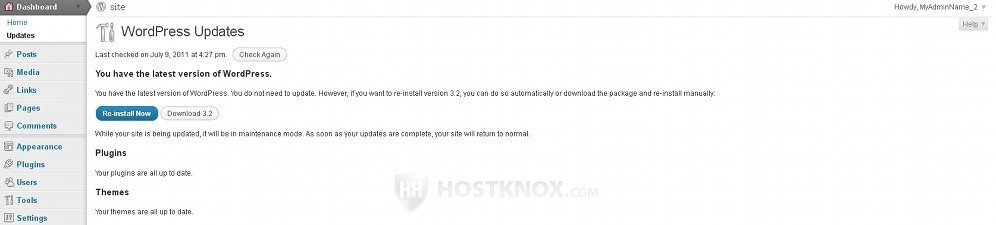
Plugins are a potential weak spot through which your site might get hacked. So update them regularly, install a plugin only when you really need it, and if you have any plugins that you don't need delete them from your blog/site.
- Passwords are an essential part of security. Make sure your admin password is not easy to guess. Don't use a dictionary word, instead use a random string of letters, numbers and symbols. It's also good if you combine upper and lower case letters (e.g. P9$kQ5?eN%f). After you've installed WordPress you can change your password from the administration panel. Log in to your Dashboard, click on the Users menu on the left, and then on the Your Profile submenu. At the bottom of the page you can change your current password with a new one. You can also change your password directly from the database which you have used to install WordPress. You can do that using phpMyAdmin (accessible from the HostKnox control panel, Databases section). There you can also change your admin user name. It can't be changed from the Dashboard. If your admin name is just admin, it's not a bad idea to change it. For more information on this the tutorial on how to reset your WordPress password and user name.
- As we mentioned databases, if you have more than one blog or other Content Management Systems (e.g. Joomla, Magento, etc.) on the same account, you should install each in a separate MySQL database and create a different user for each database. You can install many blogs/CMSs in one database, but then, if something happens to it, or someone hacks it, they all might get damaged. By keeping each installation in a separate database with a different user you minimize those risks. HostKnox clients can create databases and add users to them from the Databases section of the HostKnox control panel. If you have more than one installation in a single database, using phpMyAdmin you can select only the tables for the particular installation, export them to your local computer, then create a new database from the HostKnox control panel, and through phpMyAdmin import the downloaded SQL dump file into the new database. In this case, however, you'll also have to change the database settings in the wp-config.php file. It's located in the root WordPress directory on your HostKnox account.
- Another thing you can do to improve the security of your blog/site is to limit the access to the wp-admin folder in your WordPress root directory on the hosting account. If you have uploaded the WordPress files in a folder called wordpress the path to it would be public_html/wordpress/wp-admin. You can block all other IP addresses, except that of your local computer, so that they won't be able to access the wp-admin folder. You can do that by creating an .htaccess file inside the wp-admin folder. This can be done using the HostKnox control panel. To do it, after you open the wp-admin directory click on the link Create file, on the right side in the black area, then in the field for New File type .htaccess (don't forget the dot), and click on the button Create File. Then open the newly created .htaccess file by clicking on it and place the following rule in it:
Deny from all
Allow from <the IP of your local computer>
So if your IP address is, for example, 12.23.34.45 the lines in your .htaccess file should look like this:
Deny from all
Allow from 12.23.34.34
If you're not sure what your IP address is, you can check it from the HostKnox control panel login page or from websites such as whatismyip.org. Keep in mind that in this way the wp-admin will be accessible, as the logic suggests, only from your local computer, so you won't be able to access it from other locations. Don't forget after you put the above rules in the .htaccess file to save the changes. Click on the Save Contents button or on the Save and Close.
- You can do a similar thing with the wp-includes folder inside your WordPress root directory (e.g. public_html/wordpress/wp-includes). In this case you can do it by using rewrite rules placed in the .htaccess file in the root WordPress folder (it doesn't have to be in the wp-includes folder itself). If you don't have such a file in the root directory, create one and place the following lines in it (if you have an .htaccess file just open it and place the same code):
# Block the include-only files. RewriteEngine On RewriteBase / RewriteRule ^wp-admin/includes/ - [F,L] RewriteRule !^wp-includes/ - [S=3] RewriteRule ^wp-includes/[^/]+\.php$ - [F,L] RewriteRule ^wp-includes/js/tinymce/langs/.+\.php [F,L] RewriteRule ^wp-includes/theme-compat/ - [F,L]
- It's not a bad idea to check the file permissions of the WordPress files and directories on your hosting account. You can check and change file permissions through the HostKnox control panel or with an FTP client. Generally, your directories should have 755 permissions and your files 644. They will probably have these permissions and you won't have to change anything. Check the wp-config.php file, that's where the database name and the name and password of its user are kept. The file is in the root WordPress directory; so, for example, if the WordPress files are in a folder called wordpress on your account, the path to it would be public_html/wordpress/wp-config.php. After you install WordPress, the wp-config.php file might have permissions of 666; change it to something like 640, 440, 400. In any case the last number should be zero, so that the file is not readable by the visitor.
- Something you can also do, if you haven't installed WordPress yet, is to change the default database table prefix wp_. That can be done during the installation, when you're asked to fill in the database details; that's in case you've let WordPress create the wp-config.php file automatically. If you chose to create it manually, you can change the prefix directly in the file. You are free to choose any prefix you like (e.g. idontlikeprefixes_, ri5me9_). Check out the WordPress Installation tutorial for detailed instructions on how to install WordPress.
- Make regular backups of the WordPress files on your account and of the database used by WordPress. In case it happens that there's damage to your blog/site that can't be fixed or restored, you'll be able to use the most recent backup that doesn't have any damage to it. You can download the WordPress files from your HostKnox hosting account to your local computer with your favorite FTP client, or through SSH, and you can export your database through phpMyAdmin.