WordPress Page Form Settings Tutorial
How to manage the blocks and settings on the add and edit page form in WordPress
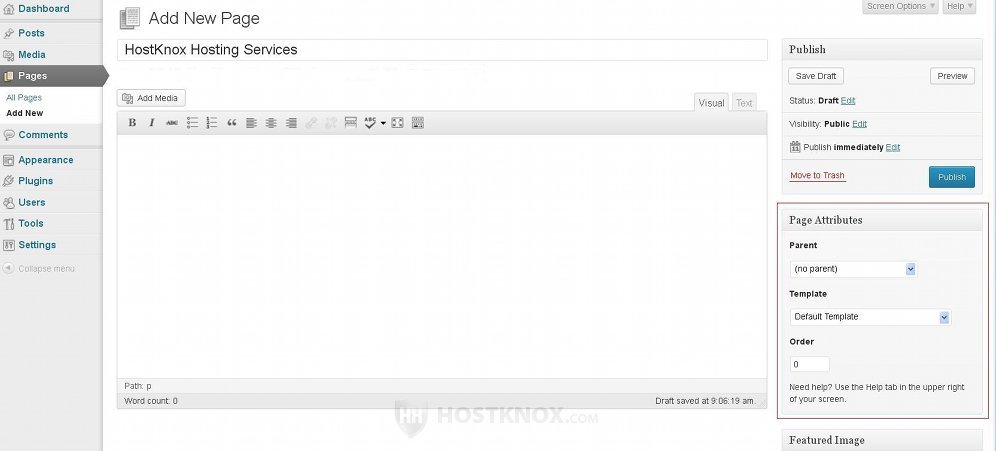
When you want to publish a static page in WordPress the only basic settings that you need to configure are the title of the page and its content. On the add/edit page form the text field for the title is at the top of the page and under it there's a built-in text editor with which you can type and format the content:

With the various buttons at the top of the built-in text editor you can italicize or make bold text in the content of the page, you can insert ordered/unordered lists, you can also insert links and different media files, and you can do many other things. If you prefer to see the HMTL tags in the text and to use HTML to format it, just click on the Text button that's in the upper right corner of the text editor.
The only thing you need to do after you specify the title and the content is to click on the Publish button that's on the right side of the page. If you're editing an existing page the button will be Update.
There are, however, other blocks with additional settings on the add/edit page form. Some of the blocks are hidden by default. Most of the settings and blocks are the same as those on the add/edit form for posts. Nevertheless, in this tutorial we'll go over all of them.
For general information on the settings in the Pages section of the admin panel (Pages menu on the left>All Pages submenu) you can check out the tutorial on managing pages in WordPress.
Screen Options and Block Positions
By default, on the add page form there are three blocks with settings: Publish, Page Attributes, Featured Image. After the page is saved a couple of other blocks will be automatically added to its edit form: Comments, Revisions. There are other blocks that are hidden by default. Using the screen options on the add/edit form you can control which blocks are shown and which are hidden. To do this click on the Screen Options button in the upper right corner. This will display a panel with some checkboxes:
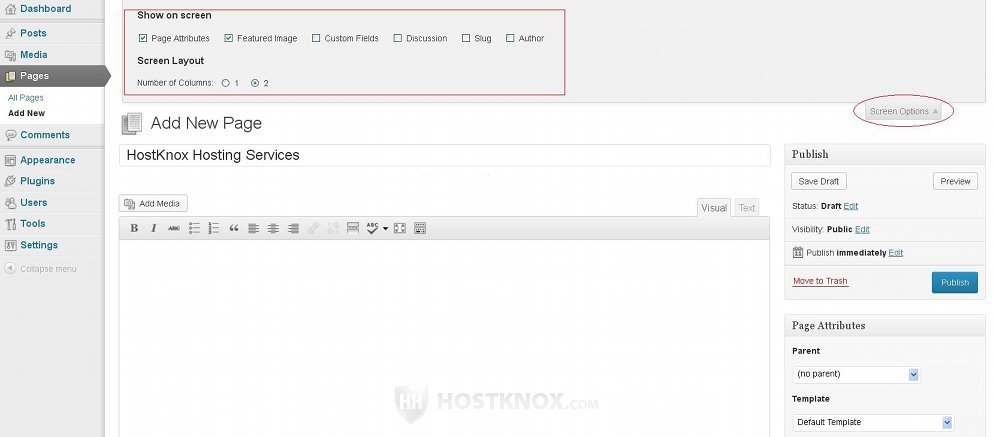
To show/hide a block mark/unmark its checkbox. The only block that can't be removed is Publish; it's the one that contains the button for publishing and updating pages. In the Screen Options panel there are also a couple of radio buttons with which you can choose whether the blocks should be displayed in a single column or in two columns. By default, two columns are used.
On the add/edit page form you can reorder the positions of the blocks. To do this hover the mouse pointer over the title of a block until the pointer turns into a four-arrow cursor, then click and hold the left mouse button, and drag and drop the block into the position you want:
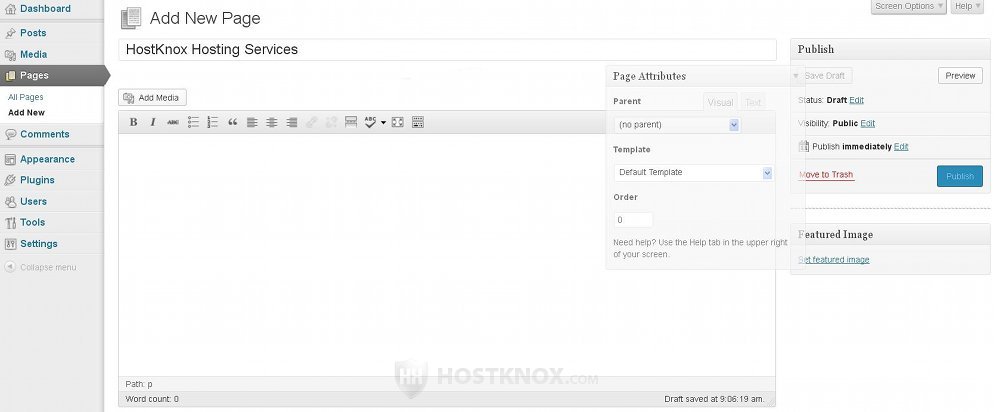
The blocks on the add/edit page form are:
Publish Block
The Publish block is the only one that can't be removed from the add/edit page form. It's primarily used for publishing new pages and updating existing ones. However, in addition to the button for publishing and updating pages it also contains some other settings: Status, Visibility, and an option with which you can schedule the page to be published in the future instead of immediately. To change any of these settings click on the Edit button next to it:
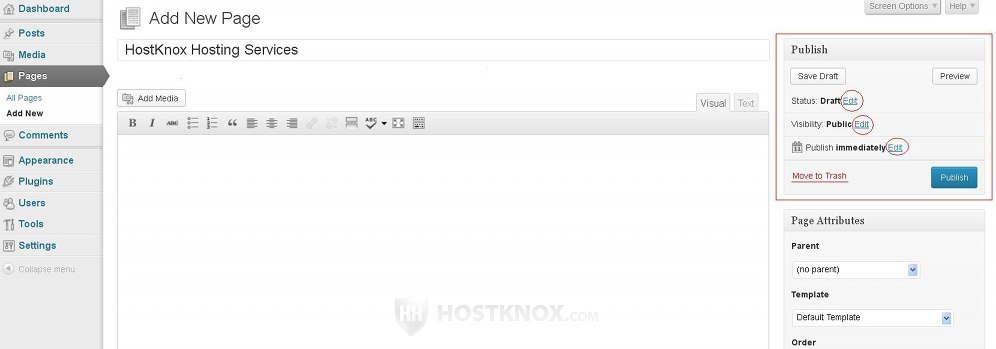
After you do that you'll be able to set a different value for the option:
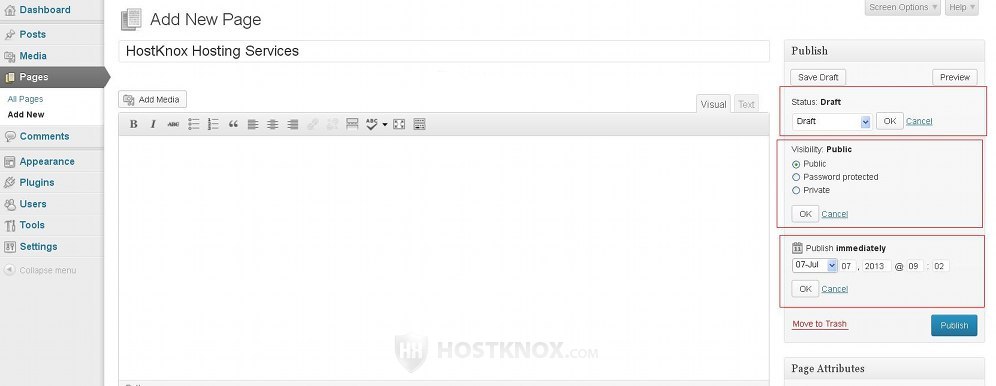
Although the Status of a new page is set to Draft, when you publish the page it will automatically be changed to Published and it will be displayed on the frontend. If, however, you change the status of a published page from Published to Draft or to Pending Review, the page will be removed from the frontend.
The Visibility of the page is set to Public. After the page is published it will be visible to anybody visiting the frontend of your site. The two other choices are Password protected and Private. If you change the visibility to Password protected, only the title of the page can be viewed on the frontend by everybody. Those who want to read its content have to type the password that you have set up. If you set the visibility to private, the page can be viewed on the frontend only by administrators.
By default, when you click on the Publish button the new page is published immediately on the frontend. If you want to, you can set some future date on which the page is to be published. Until that date the page will not be visible on the frontend. To do this click on the Edit button that's next to Publish immediately and set the date using the drop-down menu and the text fields that appear.
Page Attributes Block
This is another block that's displayed by default on the add/edit page form. Unlike other blocks which are also used on other forms such as the add/edit form for posts, this one is unique to the form for adding and editing pages. The block contains three options: Parent, Template, Order.
Pages can't be assigned to categories but you can set a page to be a subpage of another one. You can do this from the Parent drop-down menu. You can select any of the existing pages to be the parent of the one you're adding/editing. It can be a top level page, or a subpage of another one. In this way you can group pages that have something in common and establish a hierarchical relationship between them. How links to top level pages and subpages are displayed in menus on the frontend depends on the theme and on the particular menu. For example, with the default theme that comes prepackaged with WordPress, links to top level pages are automatically added to the top navigation menu. If you add a subpage, its link is displayed in a drop-down menu that appears when a visitor hovers the mouse pointer over its parent page in the top navigation menu.
With the Template drop-down menu in the Page Attributes block you can change the way the page is displayed on the frontend. What you can choose from this drop-down menu depends on the theme that you use. Some themes don't offer any choice when it comes to page templates, so if that is the case, the drop-down menu will not be included in the block at all. Other themes may offer one or two page templates in addition to the default one. For example, there might be a template that displays the page on the frontend without all the sidebar menus.
The Order option is set to 0 by default. You can use this option to set the order the pages. This affects the order of the page links in the menus on the frontend. This, however, also depends on the particular menu and on the theme. Those pages that have a lower number are displayed first. For example, the default WordPress theme puts the link to the newest top-level page on the left side of the top navigation menu on the frontend. The links to older pages are pushed to the right in the menu. However, if an older page has its Order option set to 0 and a newer one is set to 1, then the older one will be listed first. If there are subpages, their links are displayed as a drop-down menu when the mouse pointer is hovered over the parent page link in the top navigation menu. The order settings of the subpages affect the order in which they are listed in this drop-down menu.
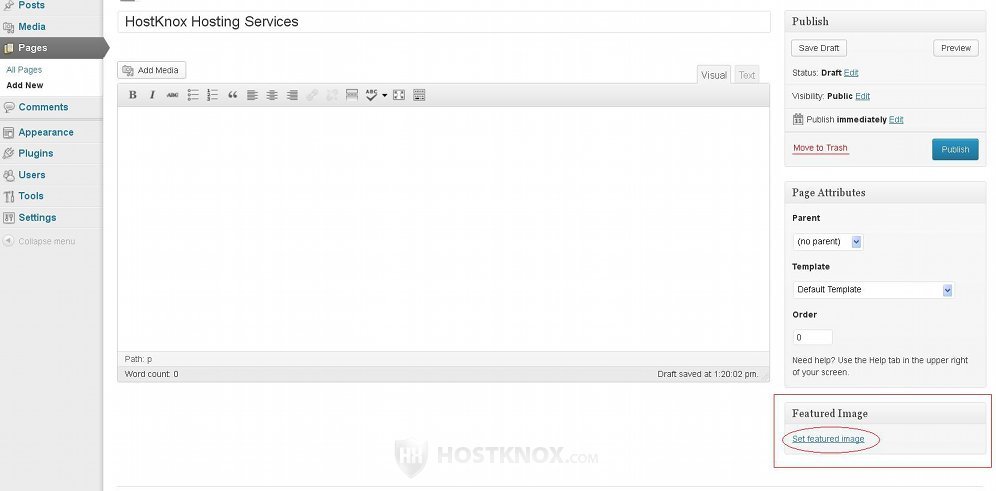
Featured Image Block
As the name suggests from this block you can add a featured image to be shown on the particular page on the frontend. To do this click on the Set featured image link that's in the block:
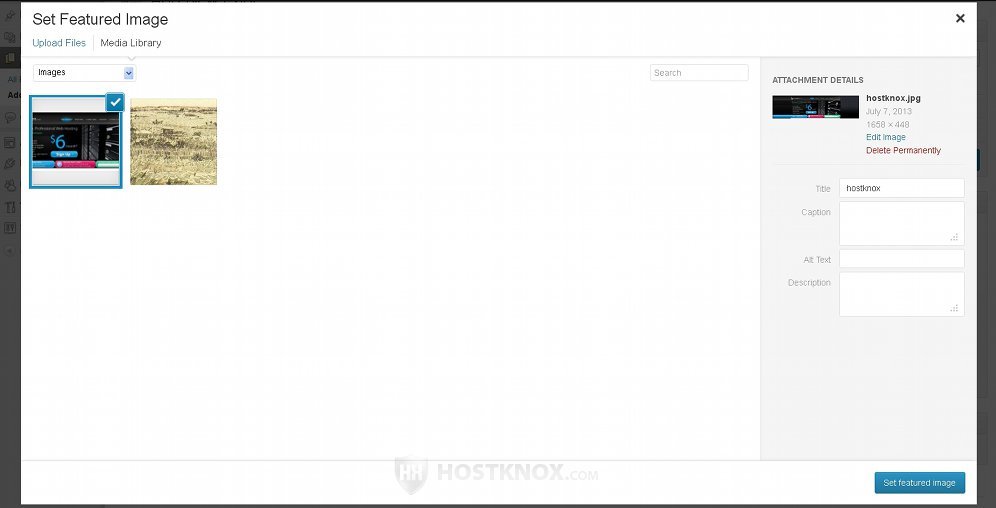
After you do that a window will pop out. You can use it to set one of the images in the media library (if you have any) to be the featured image, or you can upload a new one from your local computer:
If you set a featured image, its thumbnail will be shown in the Featured Image block on the add/edit page form. To remove the featured image simply click on the Remove featured image button that's under the thumbnail image in the block.
Keep in mind that whether the featured image will actually be displayed on the page on the frontend depends on the theme and on the page template of that theme. Some themes don't display the featured image. Others will display it but not with every page template. For example, the theme Twenty Twelve comes with three page templates and only one of them shows the featured image. Templates can be switched from the Template drop-down menu in the block Page Attributes.
You can always insert images into the content of the page itself. You can do that with the Add Media button that's above the built-in text editor. For more information check out the tutorial on how to insert images in posts and pages in WordPress.
Comments Block
The Comments block is not displayed on the add page form, and cannot be shown or hidden from the Screen Options. It's automatically added on the edit form once the page is saved/published. So from the screen options of the edit form you can choose whether to hide or show it.
The Comments block lists all the comments submitted for the page. By default, comments to all pages are allowed. When you hover the mouse pointer over a comment listed in the block some buttons will appear:
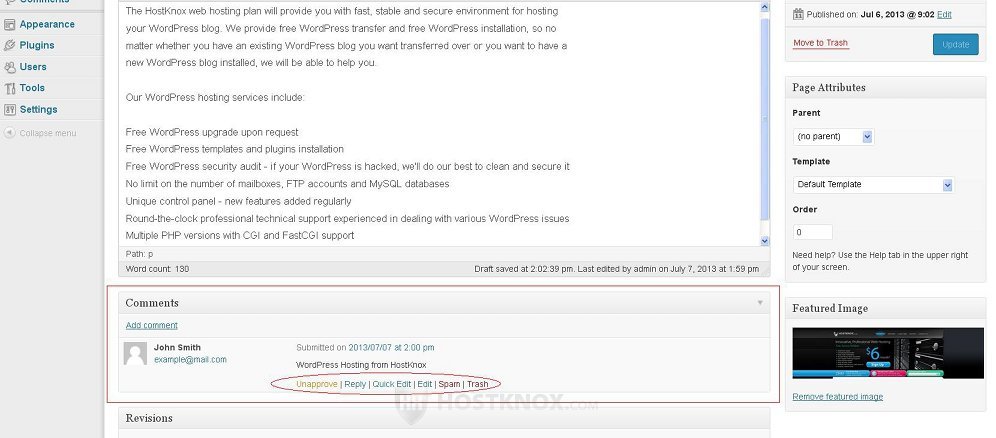
You can use the respective button to approve/unapprove the comment, mark it as spam or send it to the trash, reply or quick edit it. In the top left corner of the block there's also an Add Comment button with which you can add new comments.
Of course, you can manage all the comments to any of the pages or posts from the Comments section of the admin panel. To go there just click on the Comments tab that's in the menu on the left. For more information on this check out the tutorial on managing comments in WordPress.
Revisions Block
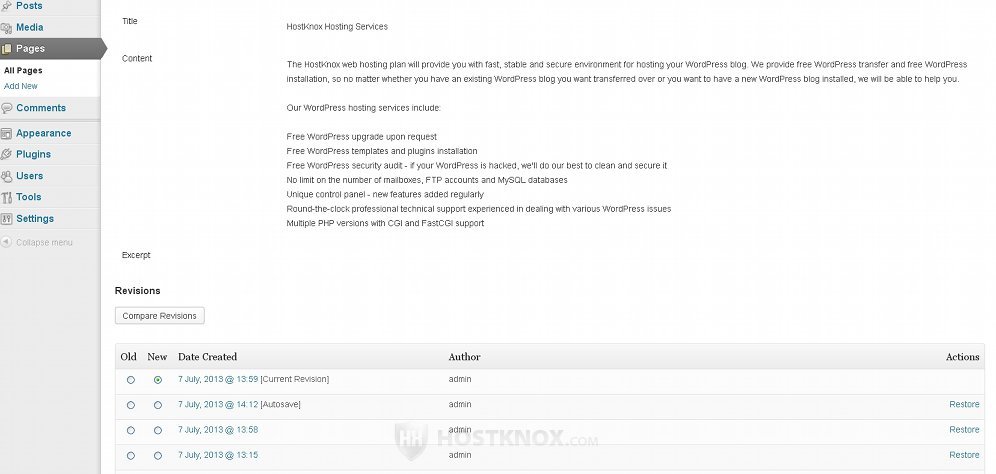
The Revisions block, like the Comments one, is automatically shown on the edit page form. It can't be included on the add form. Each time that you edit the particular page and you save the change, the Revisions block records the change. It lists all the revisions:
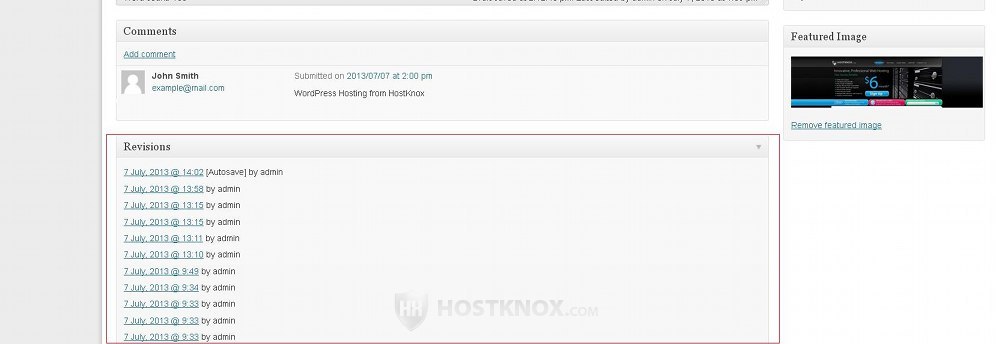
Each revision in the list is also a link. Clicking on a revision will redirect you to a new page on which you can see the content of the particular revision. Under it there's a table listing all the revision. For each revision there's a Restore button. Clicking on it will update the page with the information of the particular revision:
Custom Fields Block
The block Custom Fields is hidden by default. You can include it in the add/edit page form from the screen options. The block is used to add fields which are displayed on the page on the frontend. You can type a name and a value for the field in the respective text areas in the block:

Then click on the Add Custom Field button. Note, however, that in order for the custom fields to be shown on the frontend some code modifications have to be made.
If you want to add custom fields to your pages, it will be easier to use a plugin for managing custom fields.
Discussion Block
The Discussion block is another one that's hidden by default. You can use it to disable/enable comments and trackbacks and pingbacks for the particular page:
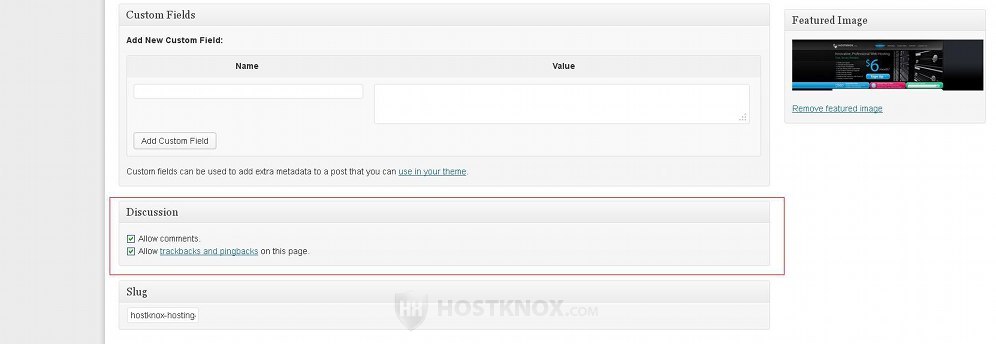
Both options are enabled by default. Changing any of the two settings will affect only the particular page that you're adding/editing.
If you want to disable/enable comments and pingbacks globally, you can do so from Settings menu on the left>Discussion submenu. The global settings will affect all new posts and pages that you add after the change. The settings of existing pages and posts will retain their previous values.
From the Discussion block on the add/edit form you can override the global settings for enabling/disabling comments and pingbacks.
Slug Block
The Slug block is also hidden by default. It contains a single text field in which you can specify the slug for the page:
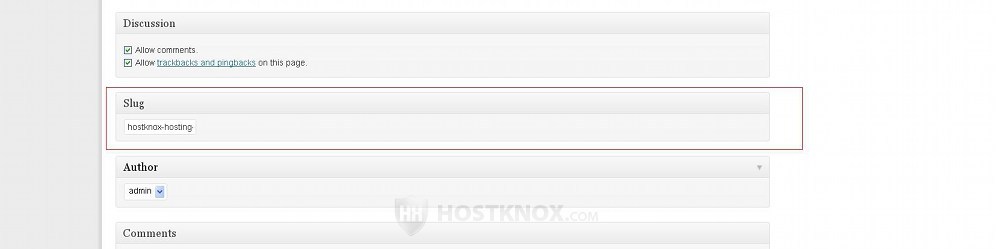
If you don't specify a slug, the name of the page will be used automatically by the system as the slug. It will automatically turn uppercase letters into lowercase ones and it will separate words with hyphens. For example, if the name of the page is HostKnox Hosting Services, the slug will be hostknox-hosting-services.
The page slug is used only when pretty permalinks are enabled. It's part of the friendly URL address of the page (the part that corresponds to the name of the page). By default, the URL of a page has the structure yourdomain.com/?page_id=2. Depending on the permalink structure that you choose it can have the form yourdomain.com/hostknox-hosting-services. In this example URL the slug is hostknox-hosting-services.
For more information on permalinks check out the tutorial on WordPress permalinks.
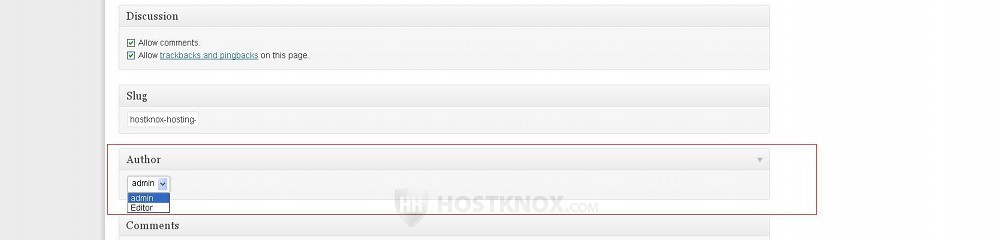
Author Block
The Author block is hidden by default. You can use it to change the author of the page that you're adding/editing. To do this just select one of the existing users from the drop-down menu in the block:
Whether the author of the page is displayed on the page on the frontend depends on the theme. Unlike posts, when it comes to static pages the author is usually not shown.