Joomla 1.7 to 2.5 Manual Upgrade Tutorial
How to upgrade Joomla from version 1.7 to 2.5 manually
The first thing that you have to do to upgrade Joomla 1.7 to 2.5 manually is to download the 2.5.0 stable update package (not the installation package). You can do this from the download section of the official Joomla site. Generally, it's easier to upgrade from a newer version (e.g. from 1.7.4 to 2.5), but there shouldn't be any problems to upgrade from 1.7.0 directly to 2.5.
After you download the archive to your local computer you have a couple of choices. You can either unzip the archive on your local computer and upload the contents using an FTP client to the root directory on your Joomla hosting account (overwriting the old files), or you can upload the archive without unzipping it to the root directory, and unzip it there. You can upload and unzip the archive using the tools available in the Files section of the HostKnox control panel. The second choice is definitely faster. So, for example, if your Joomla is installed in a folder called joomla in the root public_html directory on your hosting account, you have to upload the contents of the archive to public_html/joomla. Alternatively, you can upload the zipped archive in the same directory and unzip it there by marking the archive and clicking on the Unpack button on the right side of the control panel's Files section.
Once you do this the Joomla files will be updated. This, however, is not the end of the upgrade process. You also have to delete some files and directories, and you have to update the database used by the application by executing some SQL queries.
You can see the list of the files and directories that you have to remove from your Joomla installation in a file called scripts.php. You can open the file that's in the update package on your local computer with a text editor (e.g. Notepad, WordPad). The path to the file is administrator/components/com_admin/script.php. You can also find the same file on your hosting account. If we use the above example of the location of Joomla on your account, the path would be public_html/joomla/administrator/components/com_admin/scripts.php. The files and folders are listed towards the end of file. In the 2.5.0 Joomla update package the list looks like this (some PHP code is included too):
protected function deleteUnexistingFiles()
   {
    $files = array(
        '/includes/version.php',
        '/installation/sql/mysql/joomla_update_170to171.sql',
        '/installation/sql/mysql/joomla_update_172to173.sql',
        '/installation/sql/mysql/joomla_update_17ga.sql',
        '/libraries/joomla/application/applicationexception.php',
        '/libraries/joomla/client/http.php',
        '/libraries/joomla/filter/filterinput.php',
        '/libraries/joomla/filter/filteroutput.php',
        '/libraries/joomla/form/formfield.php',
        '/libraries/joomla/form/formrule.php',
        '/libraries/joomla/utilities/garbagecron.txt',
        '/libraries/phpmailer/language/phpmailer.lang-en.php',
        '/media/system/css/modal_msie.css',
        '/media/system/images/modal/closebox.gif',
    );

    // TODO There is an issue while deleting folders using the ftp mode
    $folders = array(
        'libraries/joomlacms',
        '/media/editors/tinymce/jscripts/tiny_mce/plugins/media/img',
        '/media/plg_highlight',
        '/media/mod_finder_status',
    );
The paths are specified in relation to the root Joomla directory on your account. For example, if again we use the above example location of Joomla on your account, the path to the first file in the list would be public_html/joomla/includes/version.php. You can remove the files and directories using the Files section of the HostKnox control panel, or you can use an FTP client. Actually, some of the listed files and/or directories may not be on your account at all.
To update the database manually you have to execute different SQL queries. You can find the queries that you have to perform in a bunch of files. You can find the files in the update package in administrator/components/com_admin/sql/updates/mysql. You can also find the same files on your hosting account. In the 2.5.0 update package, for example, the first SQL file is 1.7.0.sql and the last one is 2.5.0-2012-01-14.sql:
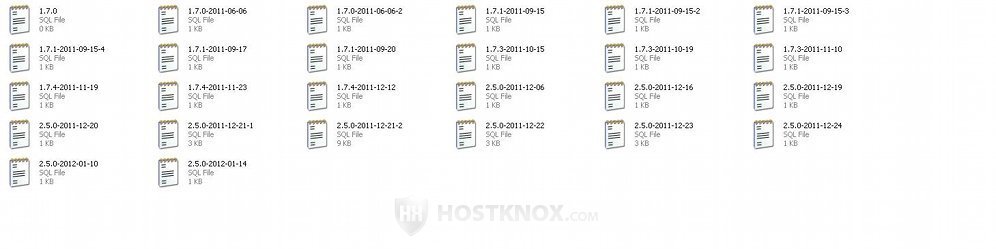
Each file contains a specific SQL query. You don't need to use all the files. This depends on the version of your Joomla (before you started the upgrade). For example, if your Joomla is version 1.7.0 you have to start with the files that begin with 1.7.1 and go all the way to the last file for version 2.5.0. If, for example, your Joomla is 1.7.4 you have to use only the files that begin with 2.5.0.
As we said, each file contains an SQL query. For example, the file 2.5.0-2011-12-16.sql has the following query in it:
CREATE TABLE IF NOT EXISTS `#__overrider` (
  `id` int(10) NOT NULL AUTO_INCREMENT COMMENT 'Primary Key',
  `constant` varchar(255) NOT NULL,
  `string` text NOT NULL,
  `file` varchar(255) NOT NULL,
  PRIMARY KEY  (`id`)
) DEFAULT CHARSET=utf8;
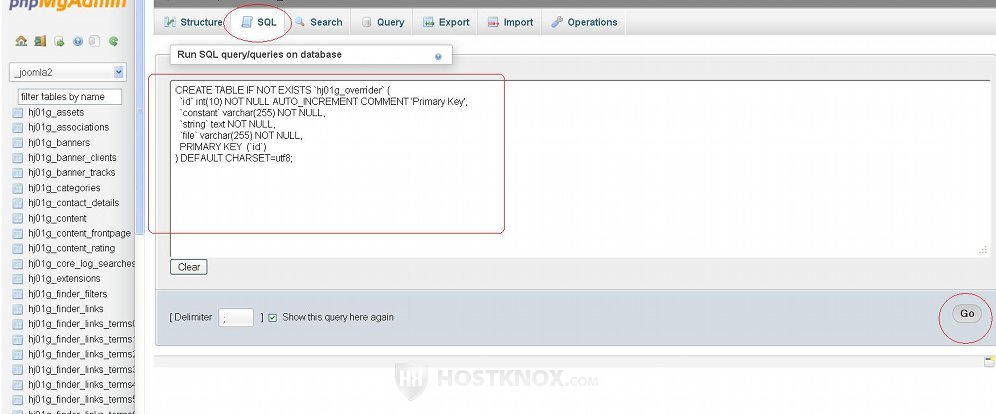
When you execute each query you have to replace the part #__ with the actual table prefix of the database. For example, if the database used by your Joomla has the table prefix hj01g_, the first line of the above query should look like this before you execute it:
CREATE TABLE IF NOT EXISTS `hj01g_overrider` (
You can execute SQL queries using phpMyAdmin. To access phpMyAdmin, go to the Databases section of the HostKnox control panel and click on the link phpMyAdmin; it's on the right side in the black area. Once in phpMyAdmin you'll see a list of all your databases in the left frame. Click on the one used by the particular Joomla installation. This will display its database tables in the right frame. Above the list of the database tables there are several tabs. Click on the one labeled SQL. Then copy the query from the particular .sql file and paste it in the textarea on the SQL tab page. Put the actual database table prefix and click on the Go button in the lower right corner to execute the query:
After you perform all the necessary SQL queries the upgrade process is finally complete, and your Joomla should be up to date. When other methods fail, the manual upgrade saves the day.