Joomla Templates Tutorial
How to change the default Joomla template and assign different templates to menus and menu items
You can change the default Joomla template from the Template Manager of your site's backend (admin panel). To access it, log in to your admin panel and either click on the Template Manager button or go to the Extensions menu and select Template Manager:

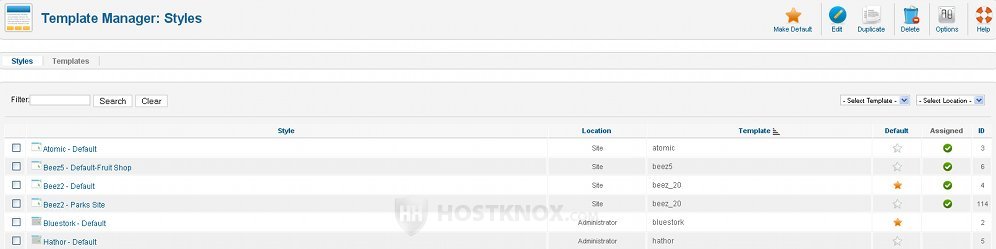
In the Template Manager you'll see all the templates for both the frontend and backend of the site. Joomla (version 1.7) comes prepackaged with several frontend templates: Atomic, Beez5, Beez2 (default and park site). There are also a couple of backend templates: Bluestork (the default one) and Hathor. The default templates for the frontend and the backend are marked with a star in the Default column:
If you haven't done any changes, the default ones should be Beez2-Default for the frontend and Bluestork for the backend. From the Templates tab in the upper left corner you can see what the different templates look like.
To change the default style either mark the checkbox in front of the chosen template and then click on the Make Default button in the upper right corner, or just click on the empty star icon for the particular template in the Default column.
Besides having one template for every page of your frontend, you can also assign different templates to particular menus or menu items on your site. This is again done from the Template Manager.
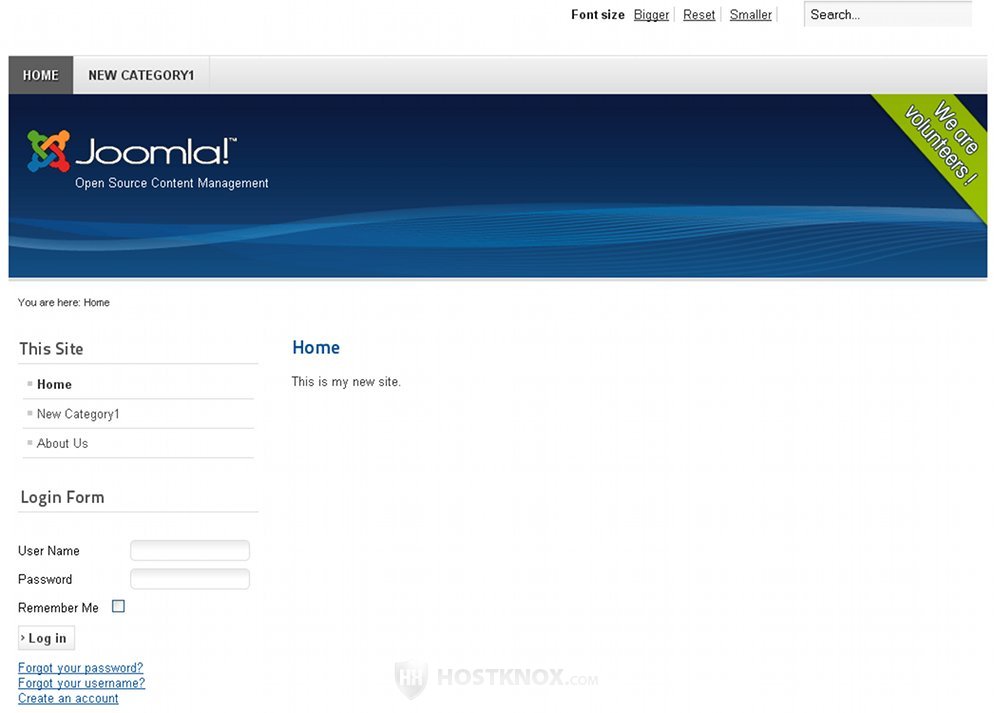
We'll use as an example a very simple site with almost no changes made to it:
We'll set the New Category1 item of the main menu, as well as the same item in the top menu, to use a different template instead of the default one (Beez2). And we'll also set the About Us item in the main menu to use a third template.
To do this we go to the backend's Template Manager. We'll only use the templates that come prepackaged with the Joomla installation pack. For New Category1 we'll use Beez5 (Fruit Shop). To set the menu item to use the new template we've chosen, we have to edit the options for the particular template (Beez5). To do this we have to either click on the name of the template or mark the checkbox in front of it and click on the Edit button in the upper right corner:
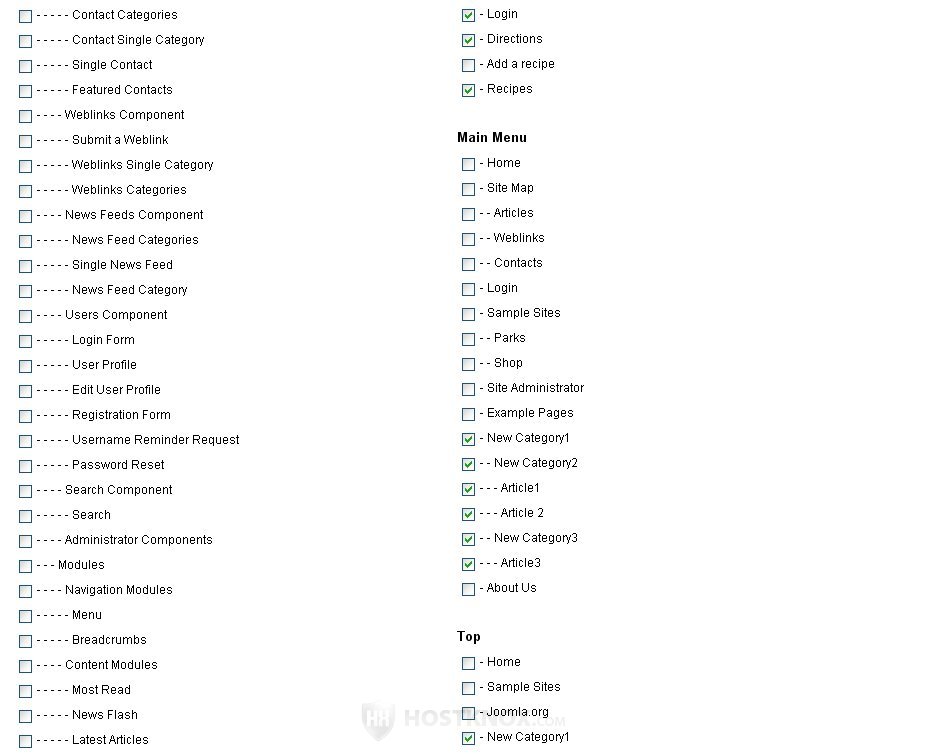
Once we do that we'll be taken to the edit screen. There's a panel titled Menu assignment which contains a list of the menus with their items. In front of every item there's a checkbox:
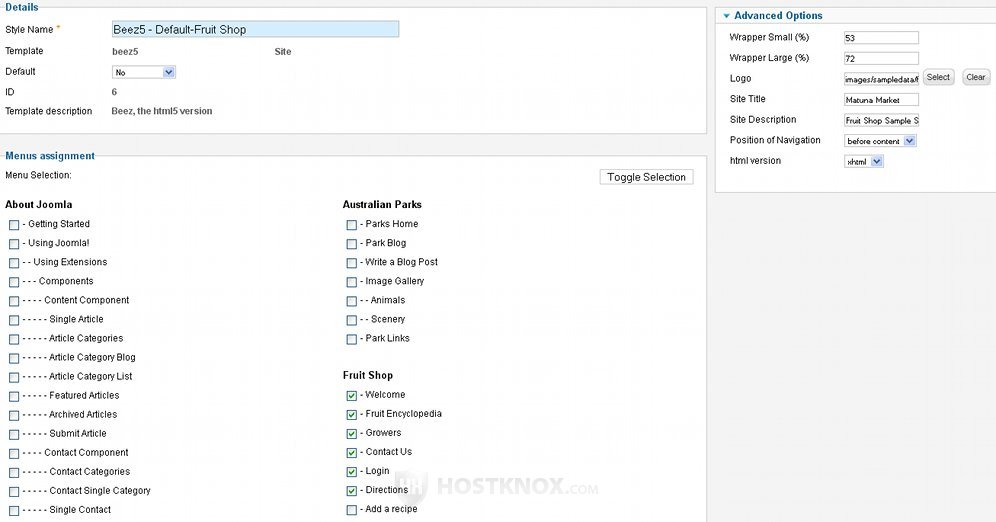
To set menu items to use the template, we just have to mark the corresponding checkboxes. In our example we'll mark the checkboxes for New Category1 in the main menu, together with its subcategories and articles. If we mark only the checkbox for the parent category (New Category1) and we leave its subcategories and articles unmarked, only the parent category will use the new template. The subcategories and articles will still use the default template. We don't want that, so we mark the parent category together with everything inside it. In our example the same item is present in the top menu and we'll also mark the checkbox there:
When everything is set we click on Save & Close to save and return to the Template Manager.
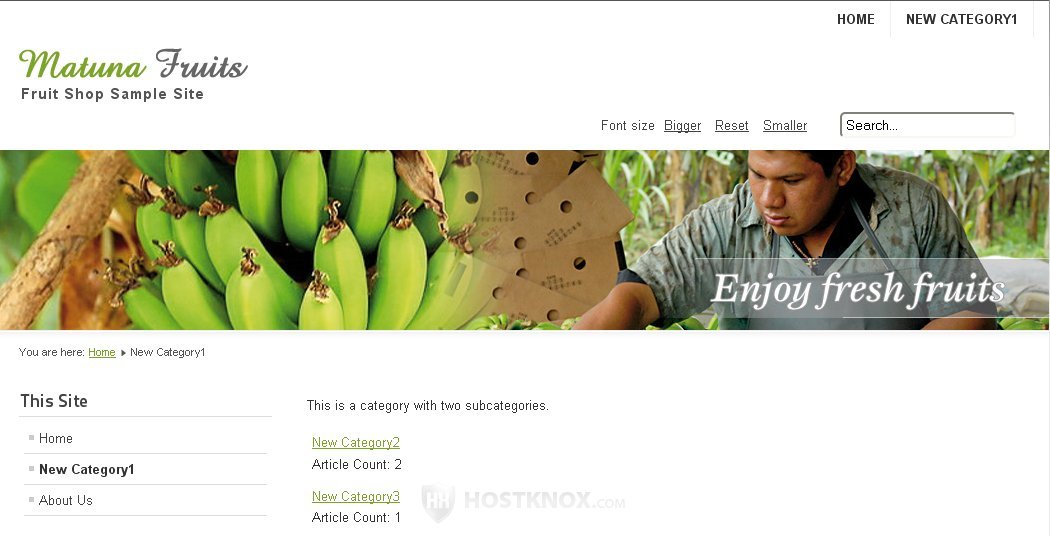
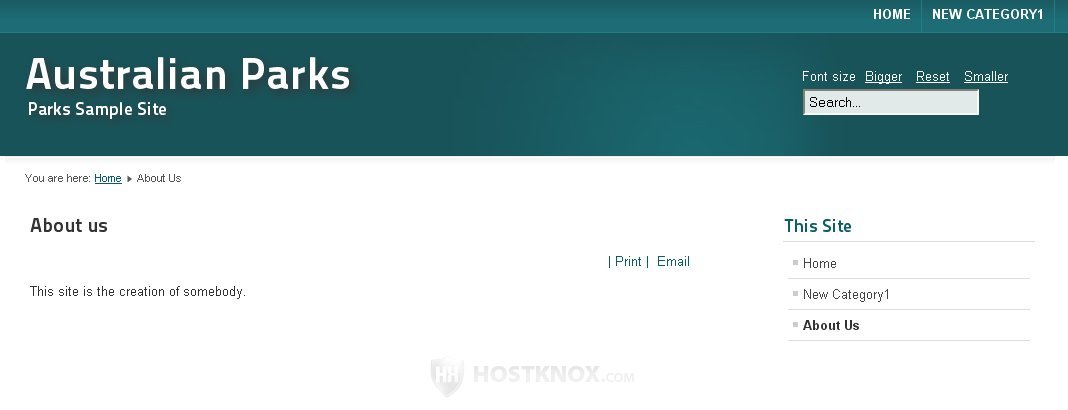
On our example page we want the About Us item of the main menu to use a third template, so we do the same actions as with New Category1, only this time we'll use Beez2-Park Site. After that we just have to refresh the site's front end and click on New Category1 to see the results for the first change:
And we can also check the new template for the About Us item in the main menu:
All the rest of the site will still use the default template.