Joomla Module Positions Tutorial
How to add new menus and other modules to your Joomla site and how to change their positions
If you want your Joomla frontend to display additional menus, or some other modules, you can add them from the Module Manager of your Joomla backend.
Menus are modules, so are the blocks around the main content of your site (e.g. login form, banner slots, breadcrumbs, etc.). Each module occupies a position slot on the page. The positions can have different places on the layout of the page depending on the template. Here we'll use as an example the default template (Beez2) that comes with Joomla (version 1.7). The examples are also from a Joomla installed with the sample data and with no changes made to the frontend of the site. The process of adding modules is exactly the same with no sample data installed.
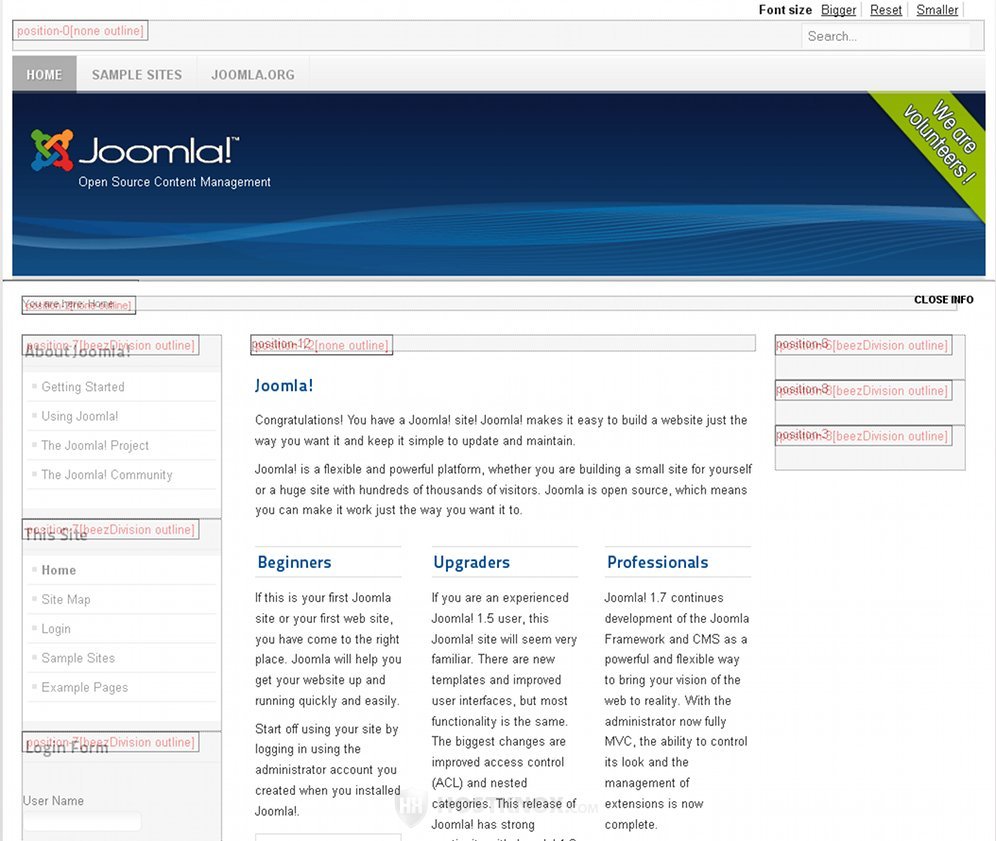
You can check the position of each module on your frontend by adding ?tp=1 or &tp=1 to the URL of your site. So, for example, if you have installed Joomla in a folder called joomla on your web hosting account, when you type yourdomain.com/joomla/?tp=1 in your browser's URL address box you'll see each module position labeled with red letters:
In order to be able to use this, the Preview Module Positions option should be enabled. To enable it, log in to your site's backend (admin panel), go to the Template Manager, click on the Options button in the upper right corner and in the window that opens set the Preview Module Positions to Enabled.
The position labels might be a bit difficult to read but nevertheless they'll help you to get an idea of where on the page each module position is situated. On our example page with the default Beez2 template the search box is in position 0, the breadcrumbs in position 2, the About Joomla! menu, the main menu (This Site) and the login form are all in position 7.
Just below them are positions 4 and 5 which by default are not used by any modules on our example page. On the right side are positions 6, 8 and 3 (from top to bottom) which are also empty at this point. At the bottom of the page are positions 9, 10 and 11 which are placed in a line one next to the other (from left to right). Right under them is position 14.
As an example we'll add a menu in position 7 and also a couple of other modules on the right side of the main content. First we'll add a new menu titled Categories which will display a category (New Category1) containing two subcategories with articles. We have created the categories and articles earlier (check the previous tutorials for more details).
Before adding a new module that will display the new menu, you have to create the menu itself. To do that go to your backend's Menu Manager: either click on the the Menu Manager button of your backend's control panel or go to the Menus menu and select Menu Manager. Then click on the New button in the upper right corner to create the new menu. On the Add Menu screen type the title of the menu and the menu type (the system name of the menu). We'll name our example menu Categories and for system name we'll type categoriesmenu:

After that we click on Save & Close to save the new menu and return to the Menu Manager. To add menu items to the new menu, open it and use the New button in the upper right corner. Of course, it is a good idea to have the new categories, articles, etc. that you want to add to the menu already created from the respective managers. If you don't know how to add menu items check out the tutorial on adding categories and articles to menus in Joomla.
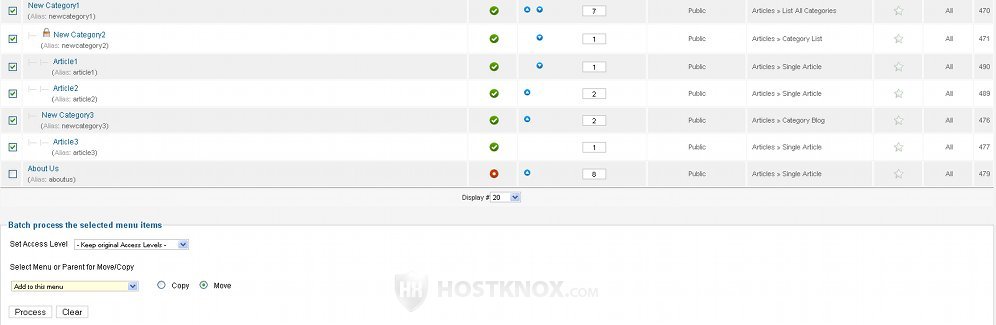
It's also possible to move or copy menu items from other menus to the new one. In our example we'll use this method. We'll move a category (e.g. New Category1) with two subcategories and articles from the main menu to the new menu we just created (Categories). To do this we go to the Menu Manager for the main menu, we mark the checkboxes for the items we want to move/copy.
At the bottom of the page there is a panel labeled Batch process the selected menu items. From the drop-down menu we select where we want to move the marked items. Under the name of the menu (Categories, in our case) we click on Add to this menu and then we click on Process:
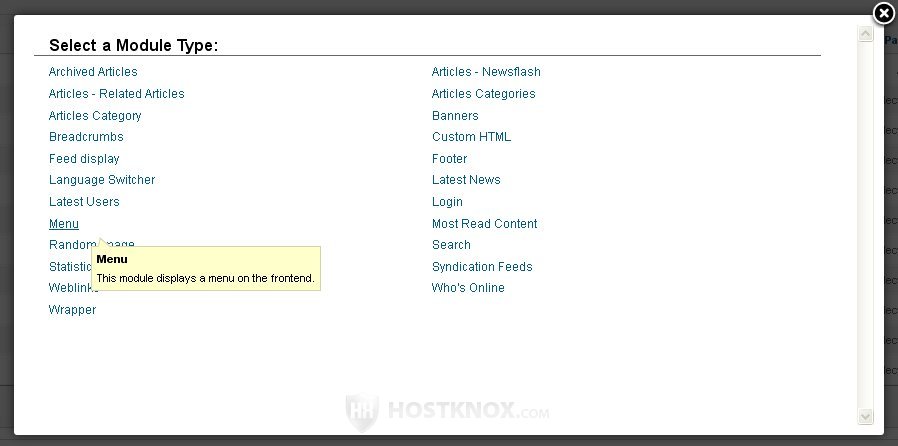
After you have created the new menu and added items to it, you have to add it as a module so that it's visible on the frontend. Go to the Module Manager (Extensions>Module Manager) and click on the New button in the upper right corner. A window will open from which you have to select the module type. In our example it's Menu:
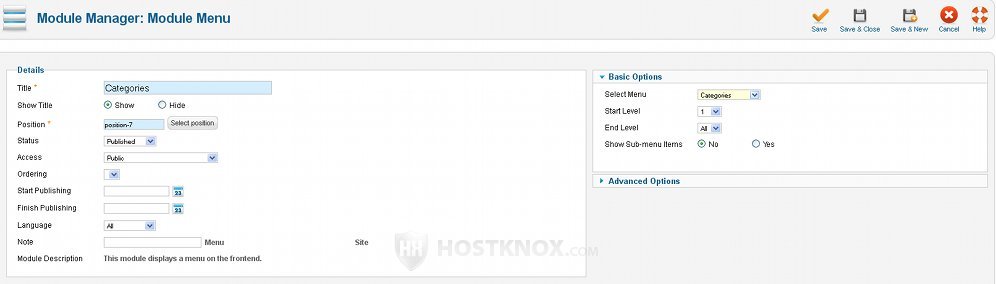
Then we have to type the name and choose the module position. We'll use the same name as the menu (Categories). You can either type the position in the Position field yourself or click on the Select position button right next to it and choose from the list of available positions for the different templates:
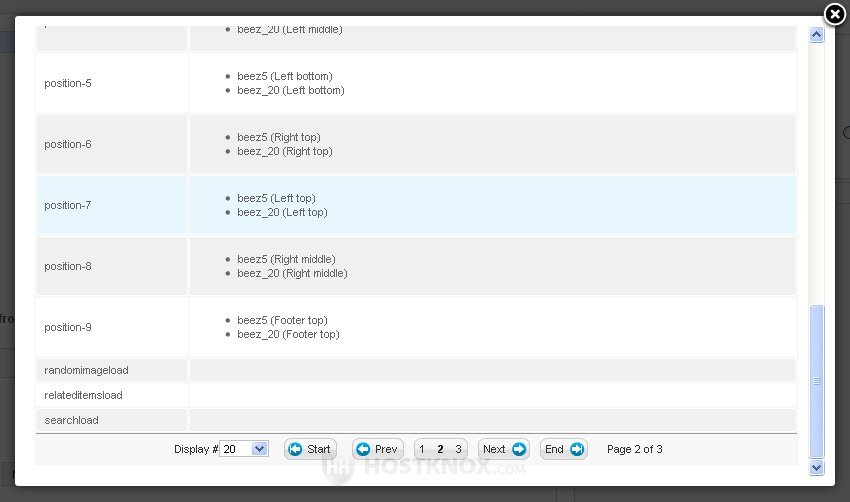
For our module we'll choose position-7. After that from the Basic Options panel we need to select the appropriate menu that we want the module to display (e.g. Categories), and then we click on Save & Close:
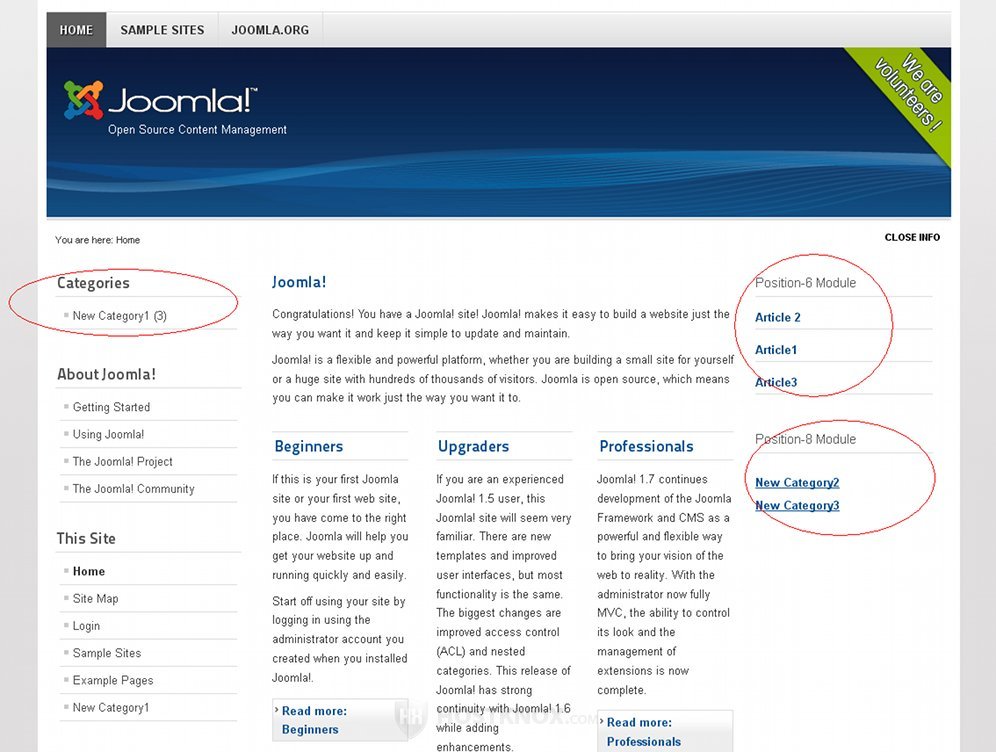
In our example we'll also add two modules in positions 6 and 8 respectively (right top and middle). We'll set the first one to display all the articles contained in our example parent category (New Category1) and the second module will display all the subcategories of the same parent category.
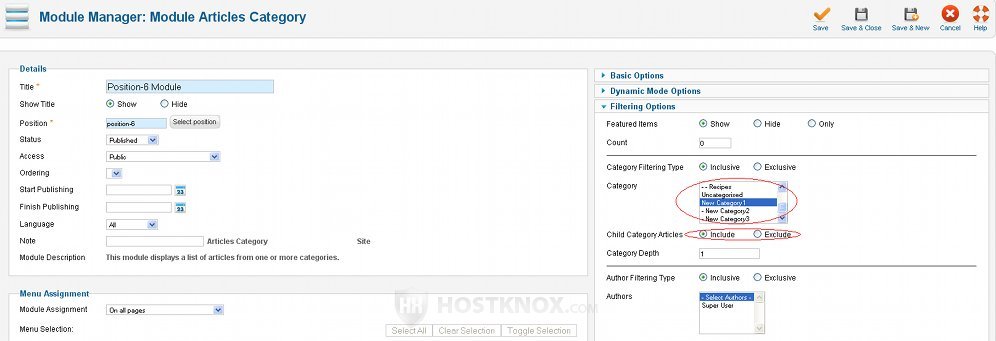
This time we don't need to create anything new before adding the modules because the content for them (the categories and articles) has already been created. So we click on the New button in the Module Manager and for module type we choose Articles Category (this is the module that displays a list of articles). After that we type a name, we choose the position (position-6) and on the right side we click on Filtering Options to set the module to display only articles from our example category. In the Filtering Options panel for Category we select our example parent category (instead of the default All Categories) and we mark the Include button for Child Category Articles because we want all the articles included in the subcategories to be displayed:
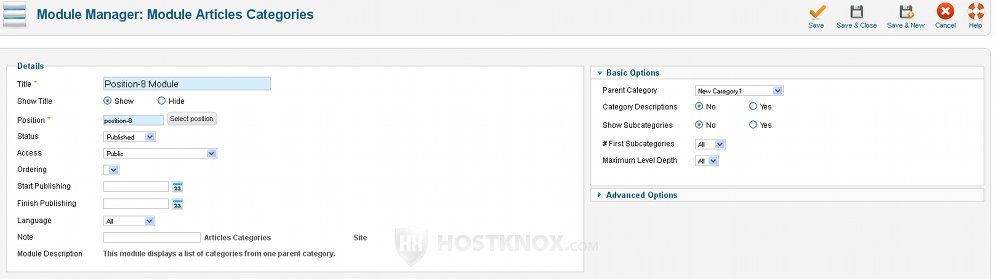
After that we click on Save & Close. Then we create the other module which we'll use to display the subcategories of our example parent category. So for module type we choose Articles Categories (Articles Category and Articles Categories are different module types). Then we type the name and for position we select position-8. From the Basic Options panel we select the desired parent category:
After we click on Save & Close we can refresh our site's frontend to see the results: